Lineage - Dataflow Quick Start
This article gives a brief overview of the Dataflow API.
Requirements
Role
The use of this API requires the role of a Server Admin.
Supported Lineage Versions
This API supports both Lineage v2 or Lineage v3.
Overview
The Dataflow can be used to add lineage data to the Alation Catalog using the dataflow object API endpoints.
Use Case
Let’s assume that we are a company selling products. There is an ETL process in place for transforming raw data and loading it into our analytical data mart (DM). We are going to use the Dataflow API to load the lineage streams of the ETL into the Catalog.
The Dataflow API can be used to retrieve, create, update, and delete dataflow objects and the lineage paths associated with them. This API bears similarity to the Lineage V2 API, but there are a number of important differences:
- It allows for updating the Title and Description fields of dataflow objects using the PATCH request. The Lineage V2 API does not offer this capability.
- The dataflow object payload must always be present in the request body when using the Dataflow API. The Lineage V2 API does not have this requirement and can be used to create direct lineage paths that do not go through a dataflow object.
- The DELETE request of the Dataflow API allows for deleting dataflow objects and the associated lineage paths with one API call.
- It provides the GET request for retrieving existing dataflow objects and lineage information.
Load Initial Test Metadata
To get started with the Dataflow API, you need some initial catalog data to work with. If you have a test database at your disposal that is already added as a data source to Alation, you can create test data using Compose. If not, you can use the Virtual Data Source feature to add test data. The SQL example below is for a MySQL database. If using a database of a different type, please make sure to use the object naming schemes expected by your database type. In our example it is Schema.Table.Column.
NoteIf you do not wish to add any test data and choose to work with an existing data source, you will need to
create your own API playloads based on the data you have. Please make sure that MDE has been performed
before adding lineage information with the Dataflow API.
Option 1: Create Test Data Using Compose
Using Compose, create the following schemas and tables in your test database and then perform MDE for the new metadata to appear in the Catalog. This example SQL is for MySQL:
CREATE SCHEMA sourceData;

CREATE TABLE sourceData.Transactions(transactionDate DATE, orderNumber INT, productCode INT, productName VARCHAR(100));

CREATE TABLE sourceData.Processing(orderNumber INT, processedBy VARCHAR(100), approvedBy VARCHAR(100), teamID INT);

CREATE SCHEMA Orders;

CREATE TABLE Orders.Orders(event_ts DATE, order_id INT);

CREATE SCHEMA reportData;

CREATE TABLE reportData.TeamsAndOrders(event_ts DATE, order_id INT, processedBy VARCHAR(100), teamID INT);
Option 2: Create Test Data Using a Virtual Data Source
If you go with the Virtual Data Source option:
- In Alation, create a Virtual Data Source, for example, of MySQL type: Sources > Add > Virtual Data Source.
- Create a CSV file with the following content:
key,table_type,column_type
sourceData,,
Orders,,
reportData,,
sourceData.Transactions,TABLE,
sourceData.Processing,TABLE,
Orders.Orders,TABLE,
reportData.TeamsAndOrders,TABLE,
sourceData.Transactions.transactionDate,,date
sourceData.Transactions.orderNumber,,int
sourceData.Transactions.productCode,,int
sourceData.Transactions.productName,,string
sourceData.Processing.orderNumber,,int
sourceData.Processing.processedBy,,string
sourceData.Processing.approvedBy,,string
sourceData.Processing.teamID,,int
Orders.Orders.event_ts,,date
Orders.Orders.order_id,,int
reportData.TeamsAndOrders.order_id,,int
reportData.TeamsAndOrders.event_ts,,date
reportData.TeamsAndOrders.processedBy,,string
reportData.TeamsAndOrders.team_id,,int
- On the Import Metadata tab of the Virtual Data Source settings, upload this CSV file into the data source.
Resulting Catalog Data
As the result, your test data source in Alation will have the following data:
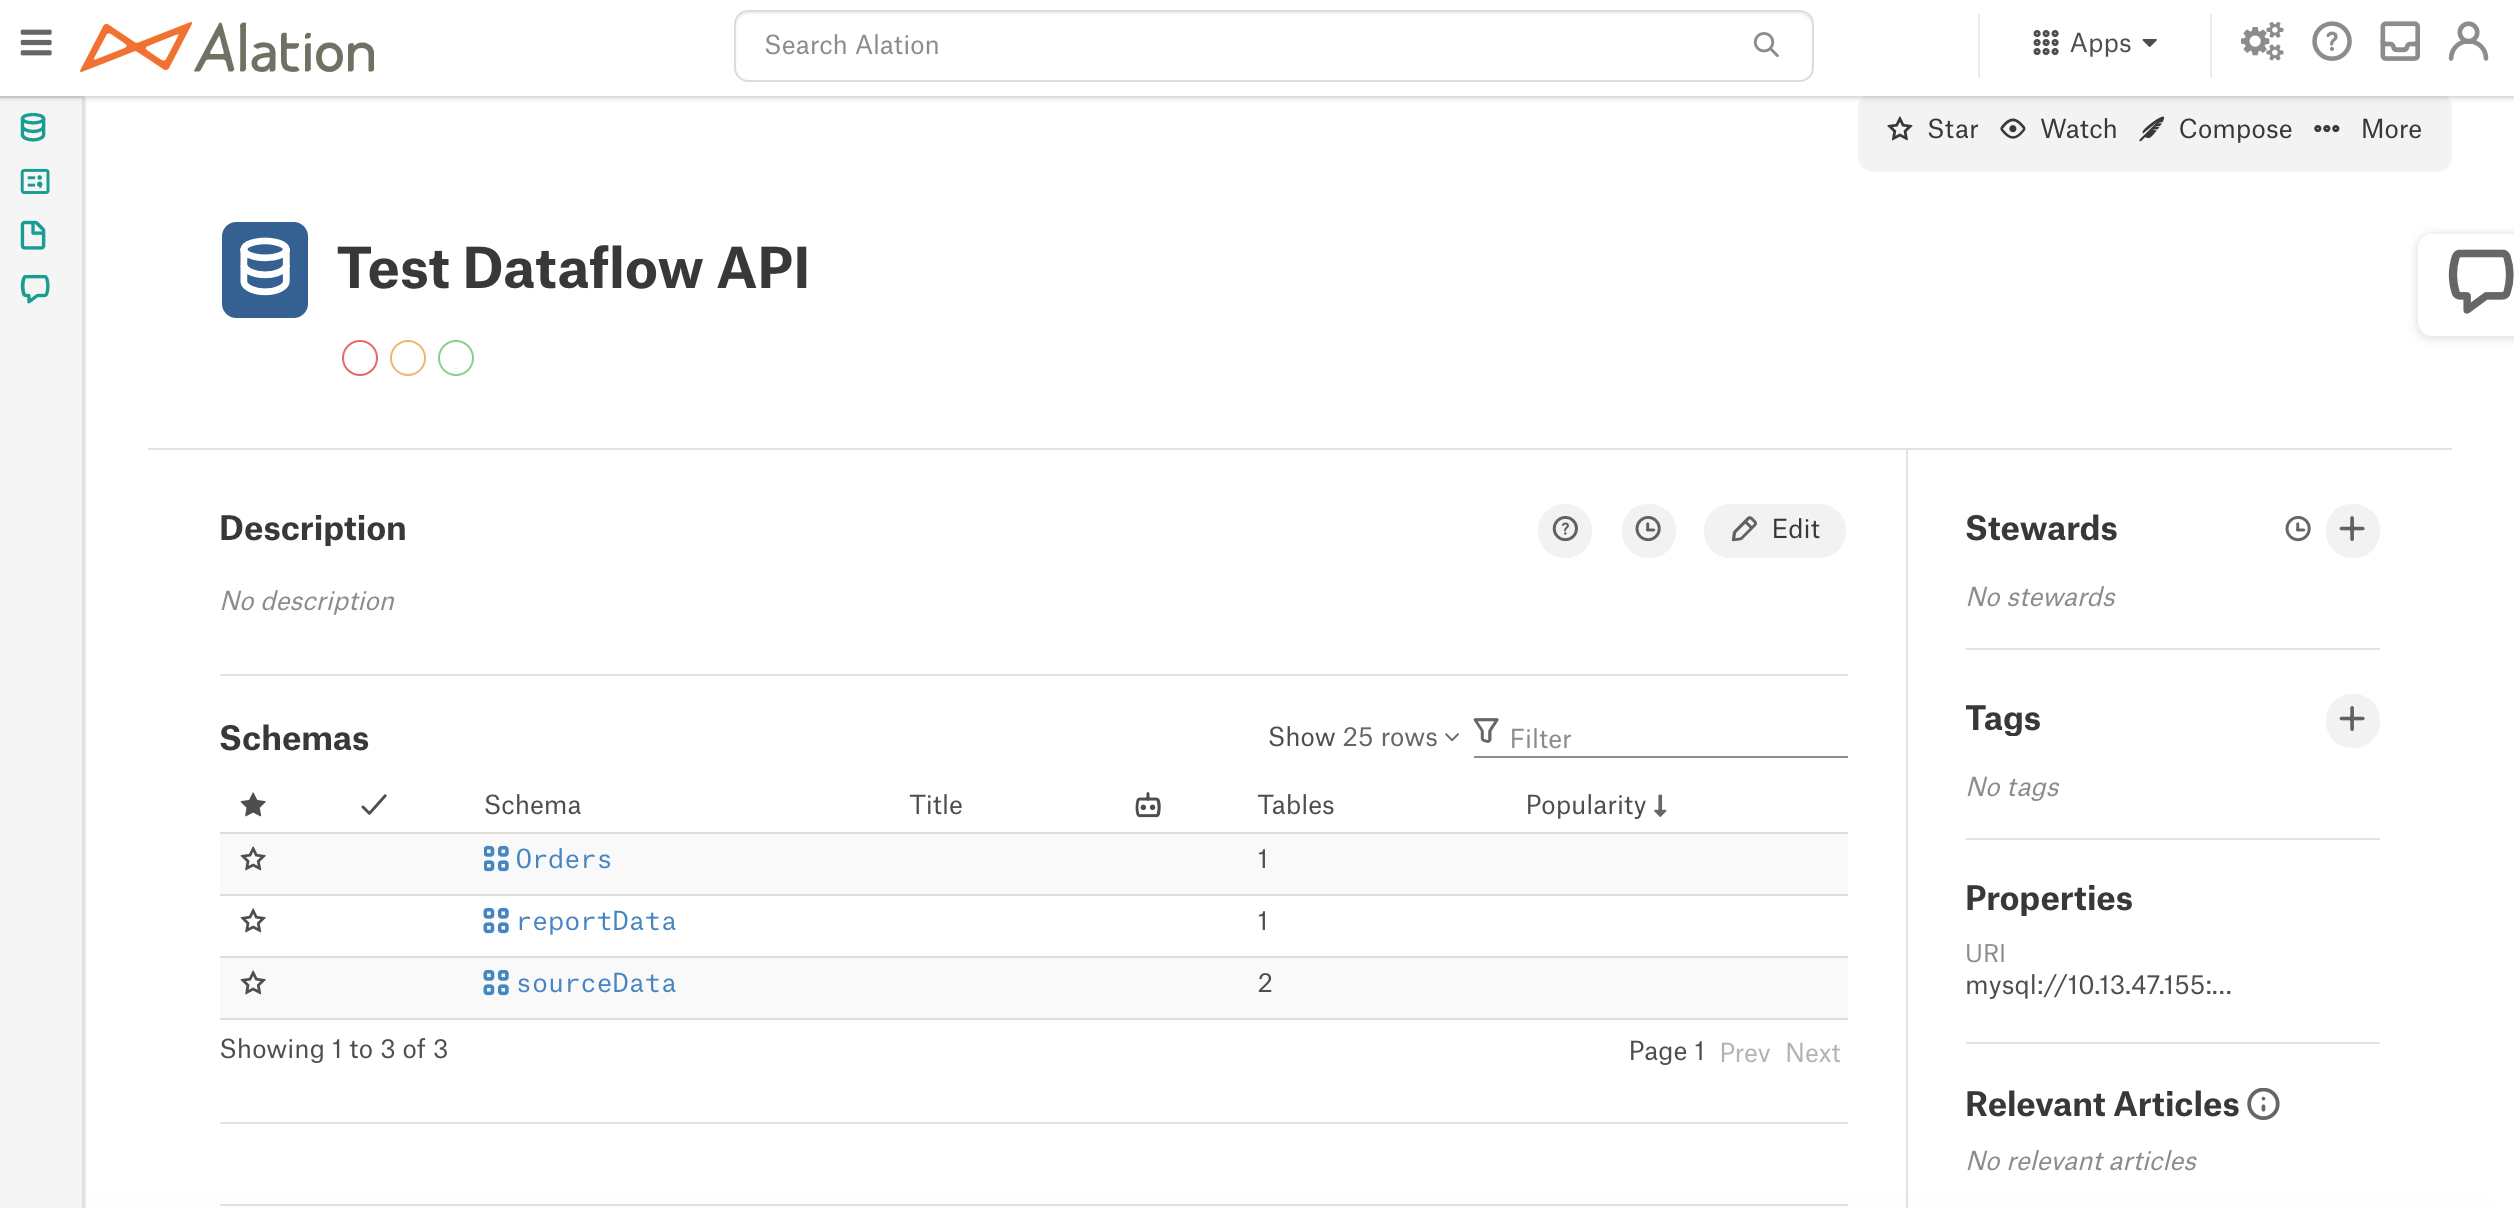
Get API Access Tokens
The use of Alation APIs requires API access tokens. If you haven’t done it yet, create the tokens using the Token API which is also available in Swagger UI.
-
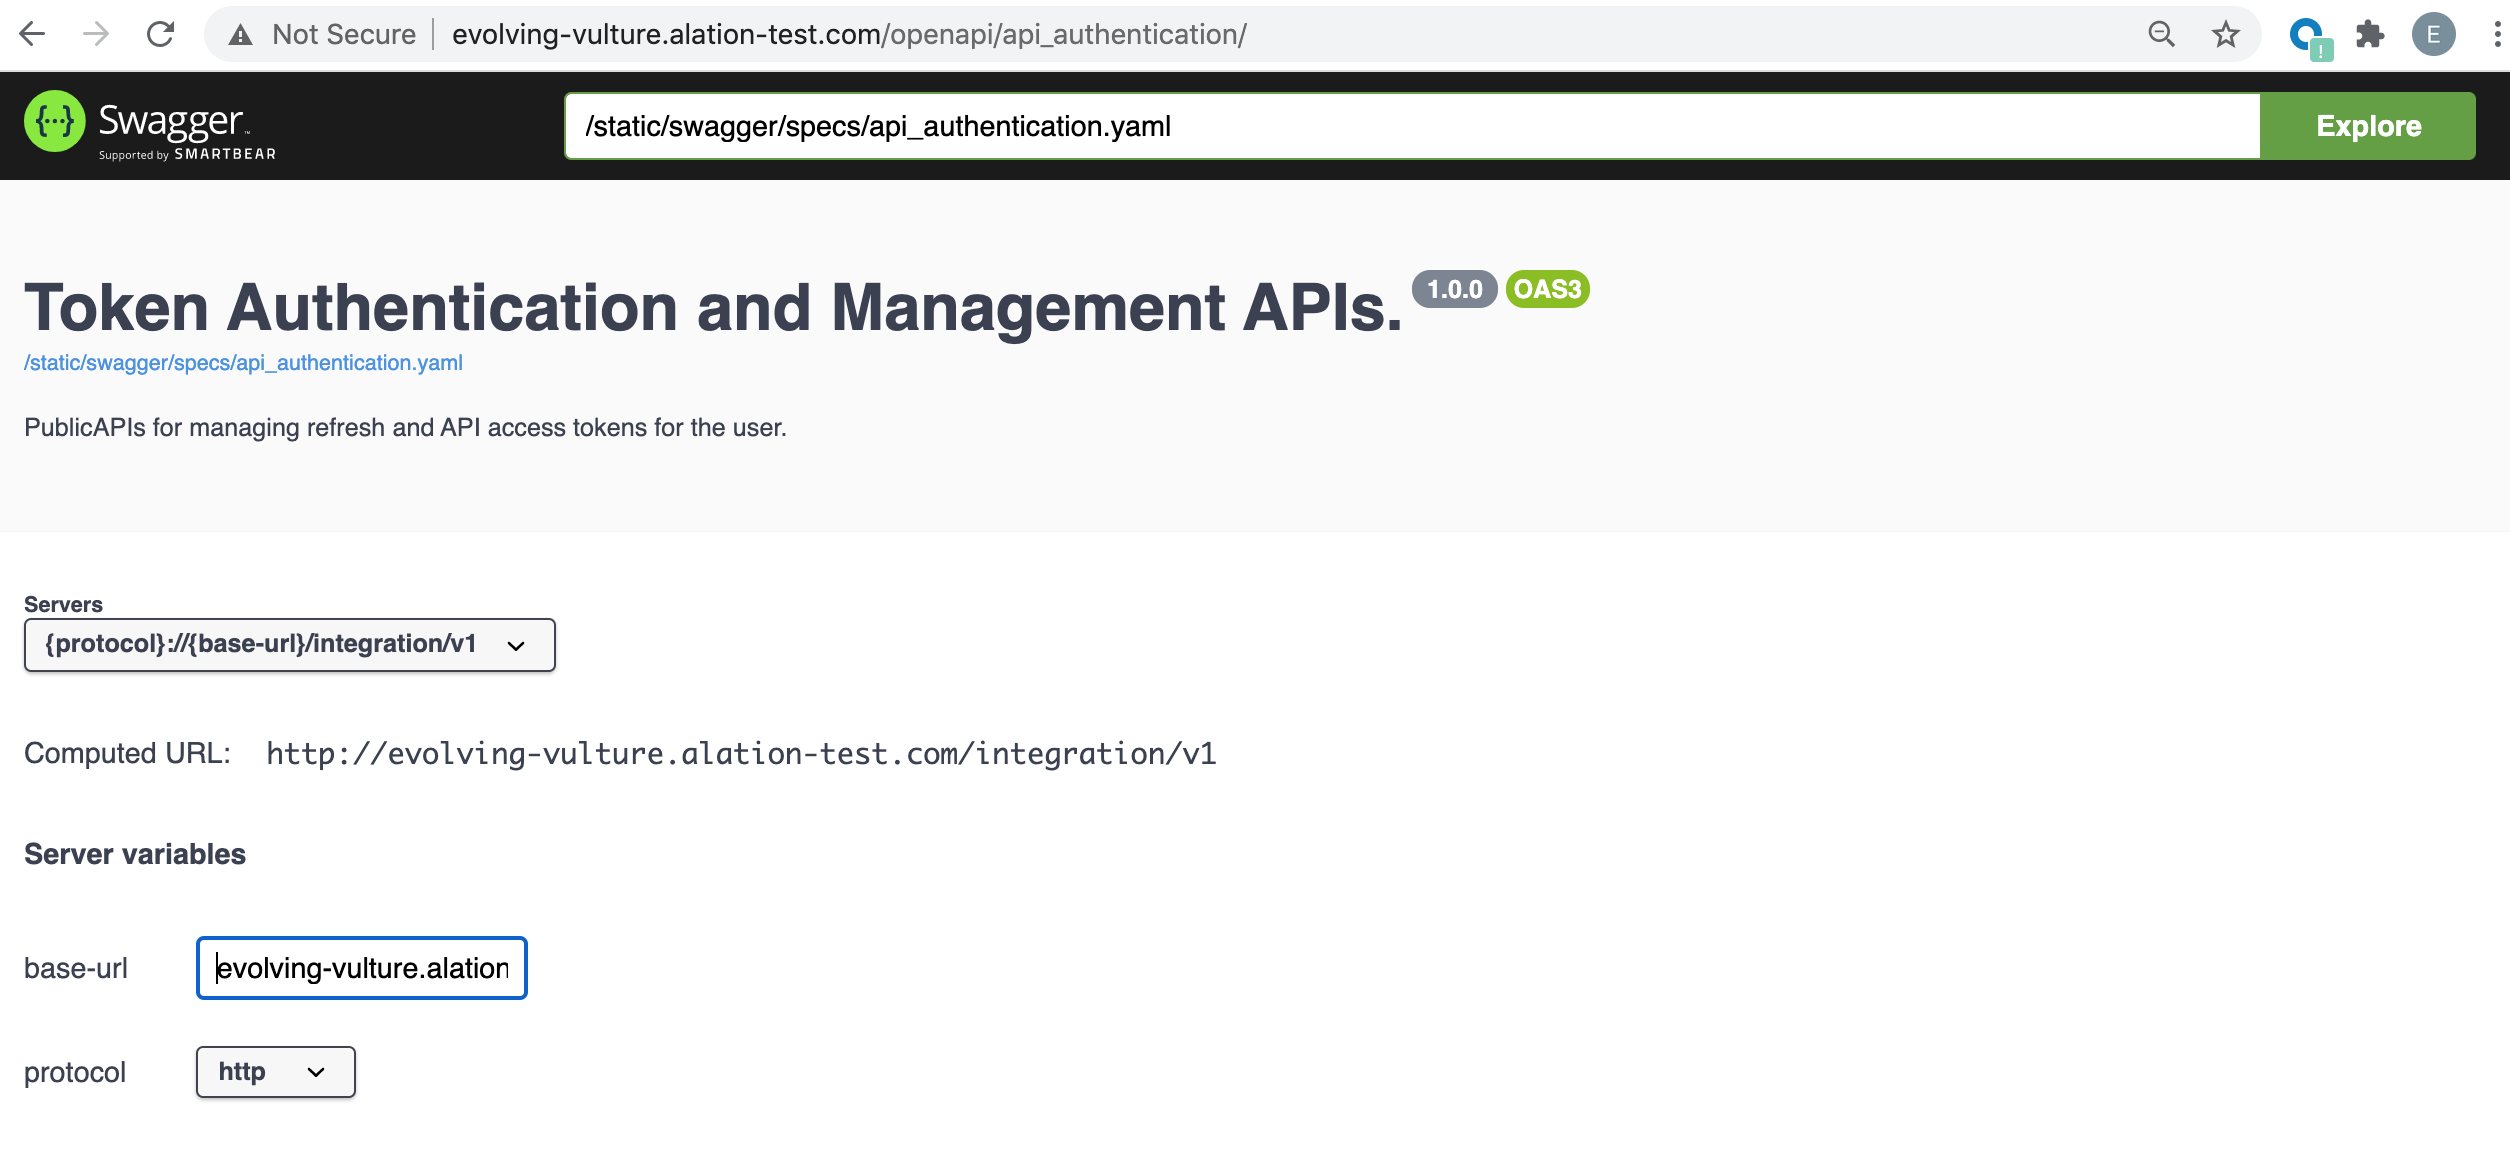
Open a new browser tab and type: <Your_Alation_URL>/openapi/api_authentication/. This will open the Token Authentication and Management APIs in Swagger UI.
-
Under Server variables, provide the base URL and protocol for your Alation instance:
-
In the RefreshToken section, use the POST request to the /createRefreshToken/ endpoint to create a Refresh token.
-
In the APIAccessToken section, use the POST request to the /createAPIAccessToken/ endpoint to create an Access token for the Refresh token you have created. This token should be used to authorize the Dataflow API requests.
Set Up the Job Status Request
Next, let’s set up a Job Status request using the Jobs APIs . This will help to check the status of API calls and troubleshoot any issues. The Job Status API is not available in Swagger UI, so we’ll use software like Postman to set up this request.
- In Postman, create a GET request to https://<Your_Alation_URL>/api/v1/bulk_metadata/job/?id= <JOB_ID>, substituting <Your_Alation_URL> and <JOB_ID> with real values.
- Specify the API Access Token in the Header.
The POST, DELETE, and PATCH requests we are going to make using the Dataflow API will return a job ID in the response that can be used to check on the job status using this Job Status API.
Create Lineage Links
Transaction > Orders
First, we will create lineage between the Orders and the Transactions tables of the test data at the column level, using the POST request of the Dataflow API. This endpoint allows for creating dataflow objects and lineage links in one call. We will create one dataflow object and 2 lineage links between the source and target tables.
- In a new browser tab, type: <Your_Alation_URL>/openapi/lineage/, substituting <Your_Alation_URL> with your Alation URL. This will open the Lineage V2 OAS 3.0 specification.
- Under Server variables, provide the base URL and protocol for your Alation instance.
- On the right, click Authorize and provide a valid API Access Token. Then close the dialog.
- In the Dataflow section, click POST and then click Try it Out on the right.
ImportantThe request body must include the dataflow_objects payload and can also include the paths payload.
dataflow_objects includes the dataflow objects information. Each created dataflow object is uniquely identified by the external_id property. In any Dataflow API request, this is the required key for the dataflow object included into the payload.
paths is an array that can include multiple sub-arrays with lineage link information. Each path includes the source object(s), the dataflow object, and the target object(s) arrays.
- Edit the request body and paste the following payload, substituting the data source ID with the actual data source ID in your Alation instance:
{
  "dataflow_objects": [
    {
    "external_id": "api/external_dfo_01",
    "title": "Creating the Orders table",
    "description": "The Orders table is created from the Transactions source table",
    "content": "CREATE TABLE Orders.Orders SELECT sourceData.Transactions.transactionDate AS event_ts, sourceData.Transactions.orderNumber AS order_id FROM sourceData.Transactions;"
    }
  ],
  "paths": [
    [
      [
        {"otype": "attribute", "key": "<DS_ID>.sourceData.Transactions.transactionDate"}
          ],
      [
        {"otype": "dataflow", "key": "api/external_dfo_01"}
          ],
      [
        {"otype": "attribute", "key": "<DS_ID>.Orders.Orders.event_ts"}
          ]
      ],
    [
      [
        {"otype": "attribute", "key": "<DS_ID>.sourceData.Transactions.orderNumber"}
          ],
      [
        {"otype": "dataflow", "key": "api/external_dfo_01"}
          ],
      [
        {"otype": "attribute", "key": "<DS_ID>.Orders.Orders.order_id"}
          ]
        ]
      ]
    }
-
Click Execute. This call creates 1 dataflow object and 2 lineage paths that go through it. You will also receive a job id as the result of this call. Use Postman and the Job Status API to check on the status of this job. Note that all APIs require the API Access token to be added to the request header.
-
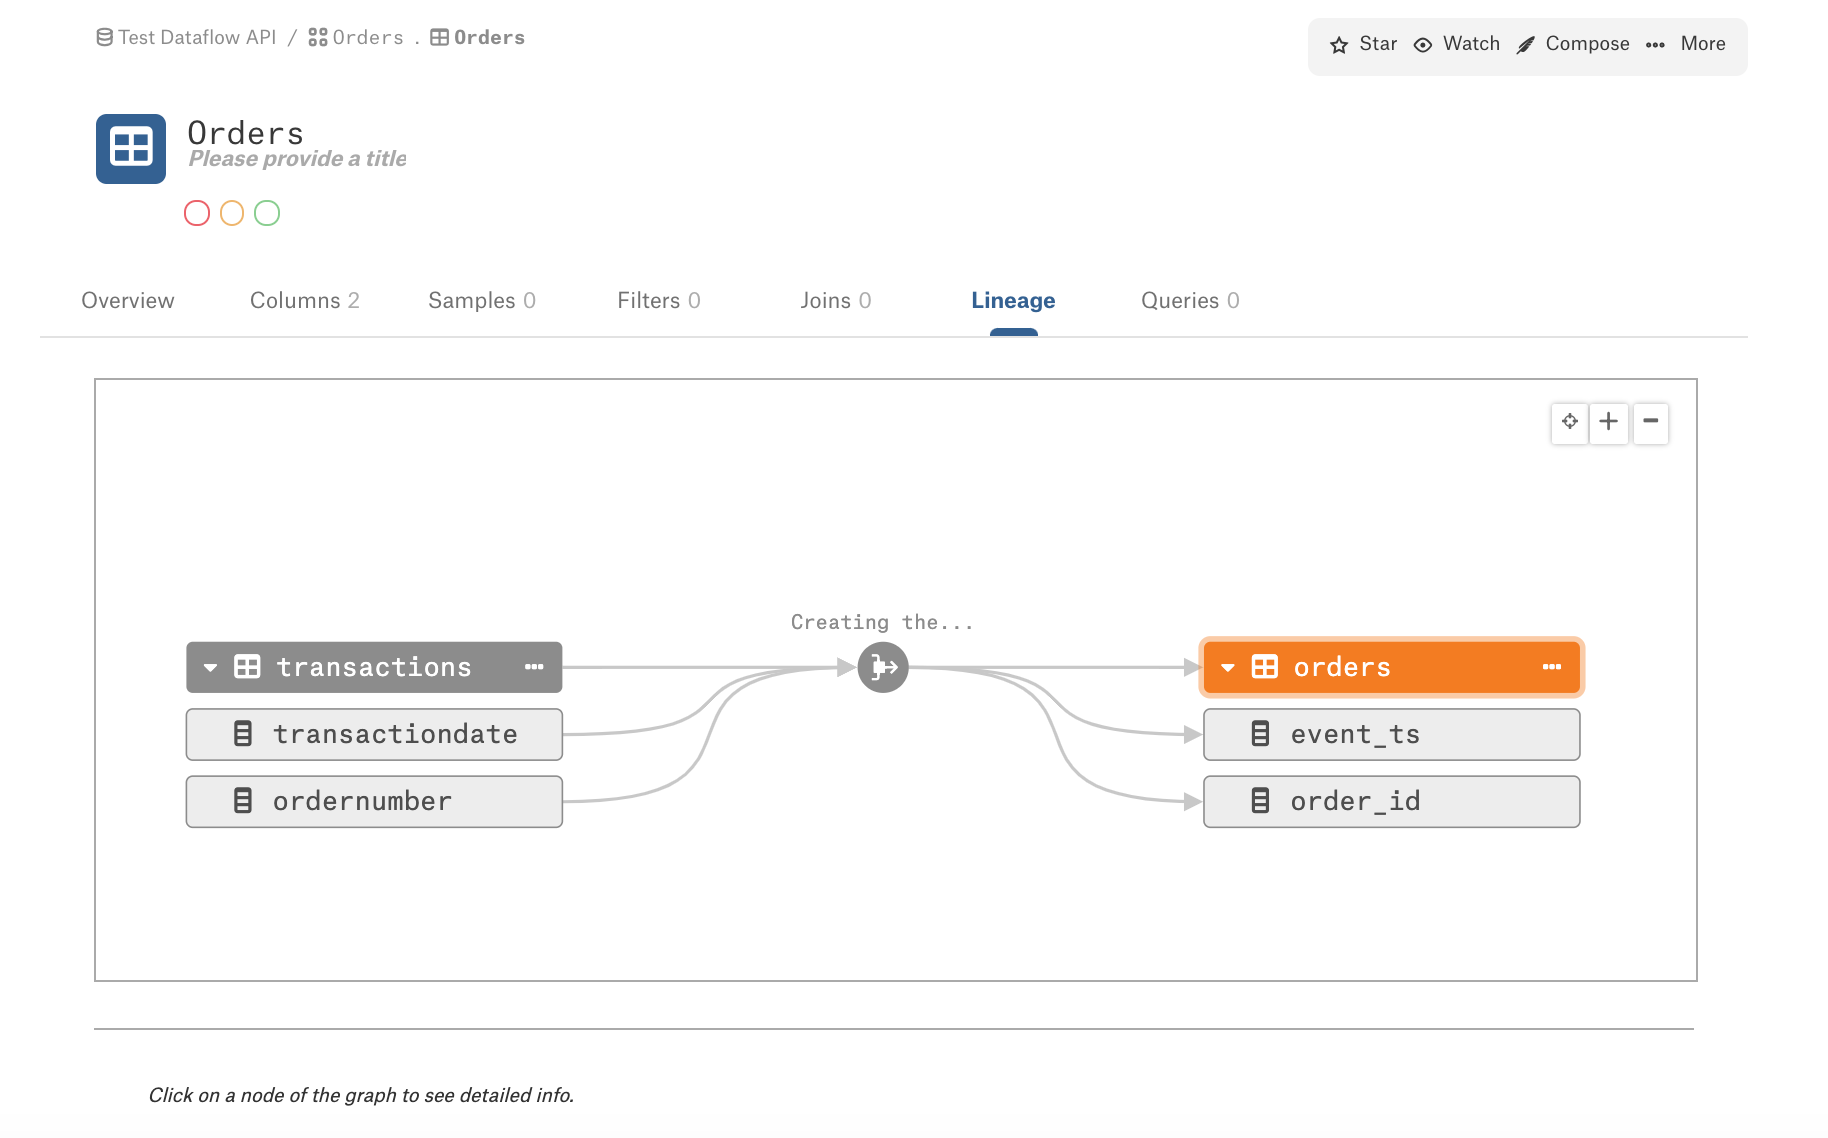
In Alation, go to your data source page and navigate to the Orders schema > Orders table page. The Lineage tab will now be enabled and the following lineage data will be available:
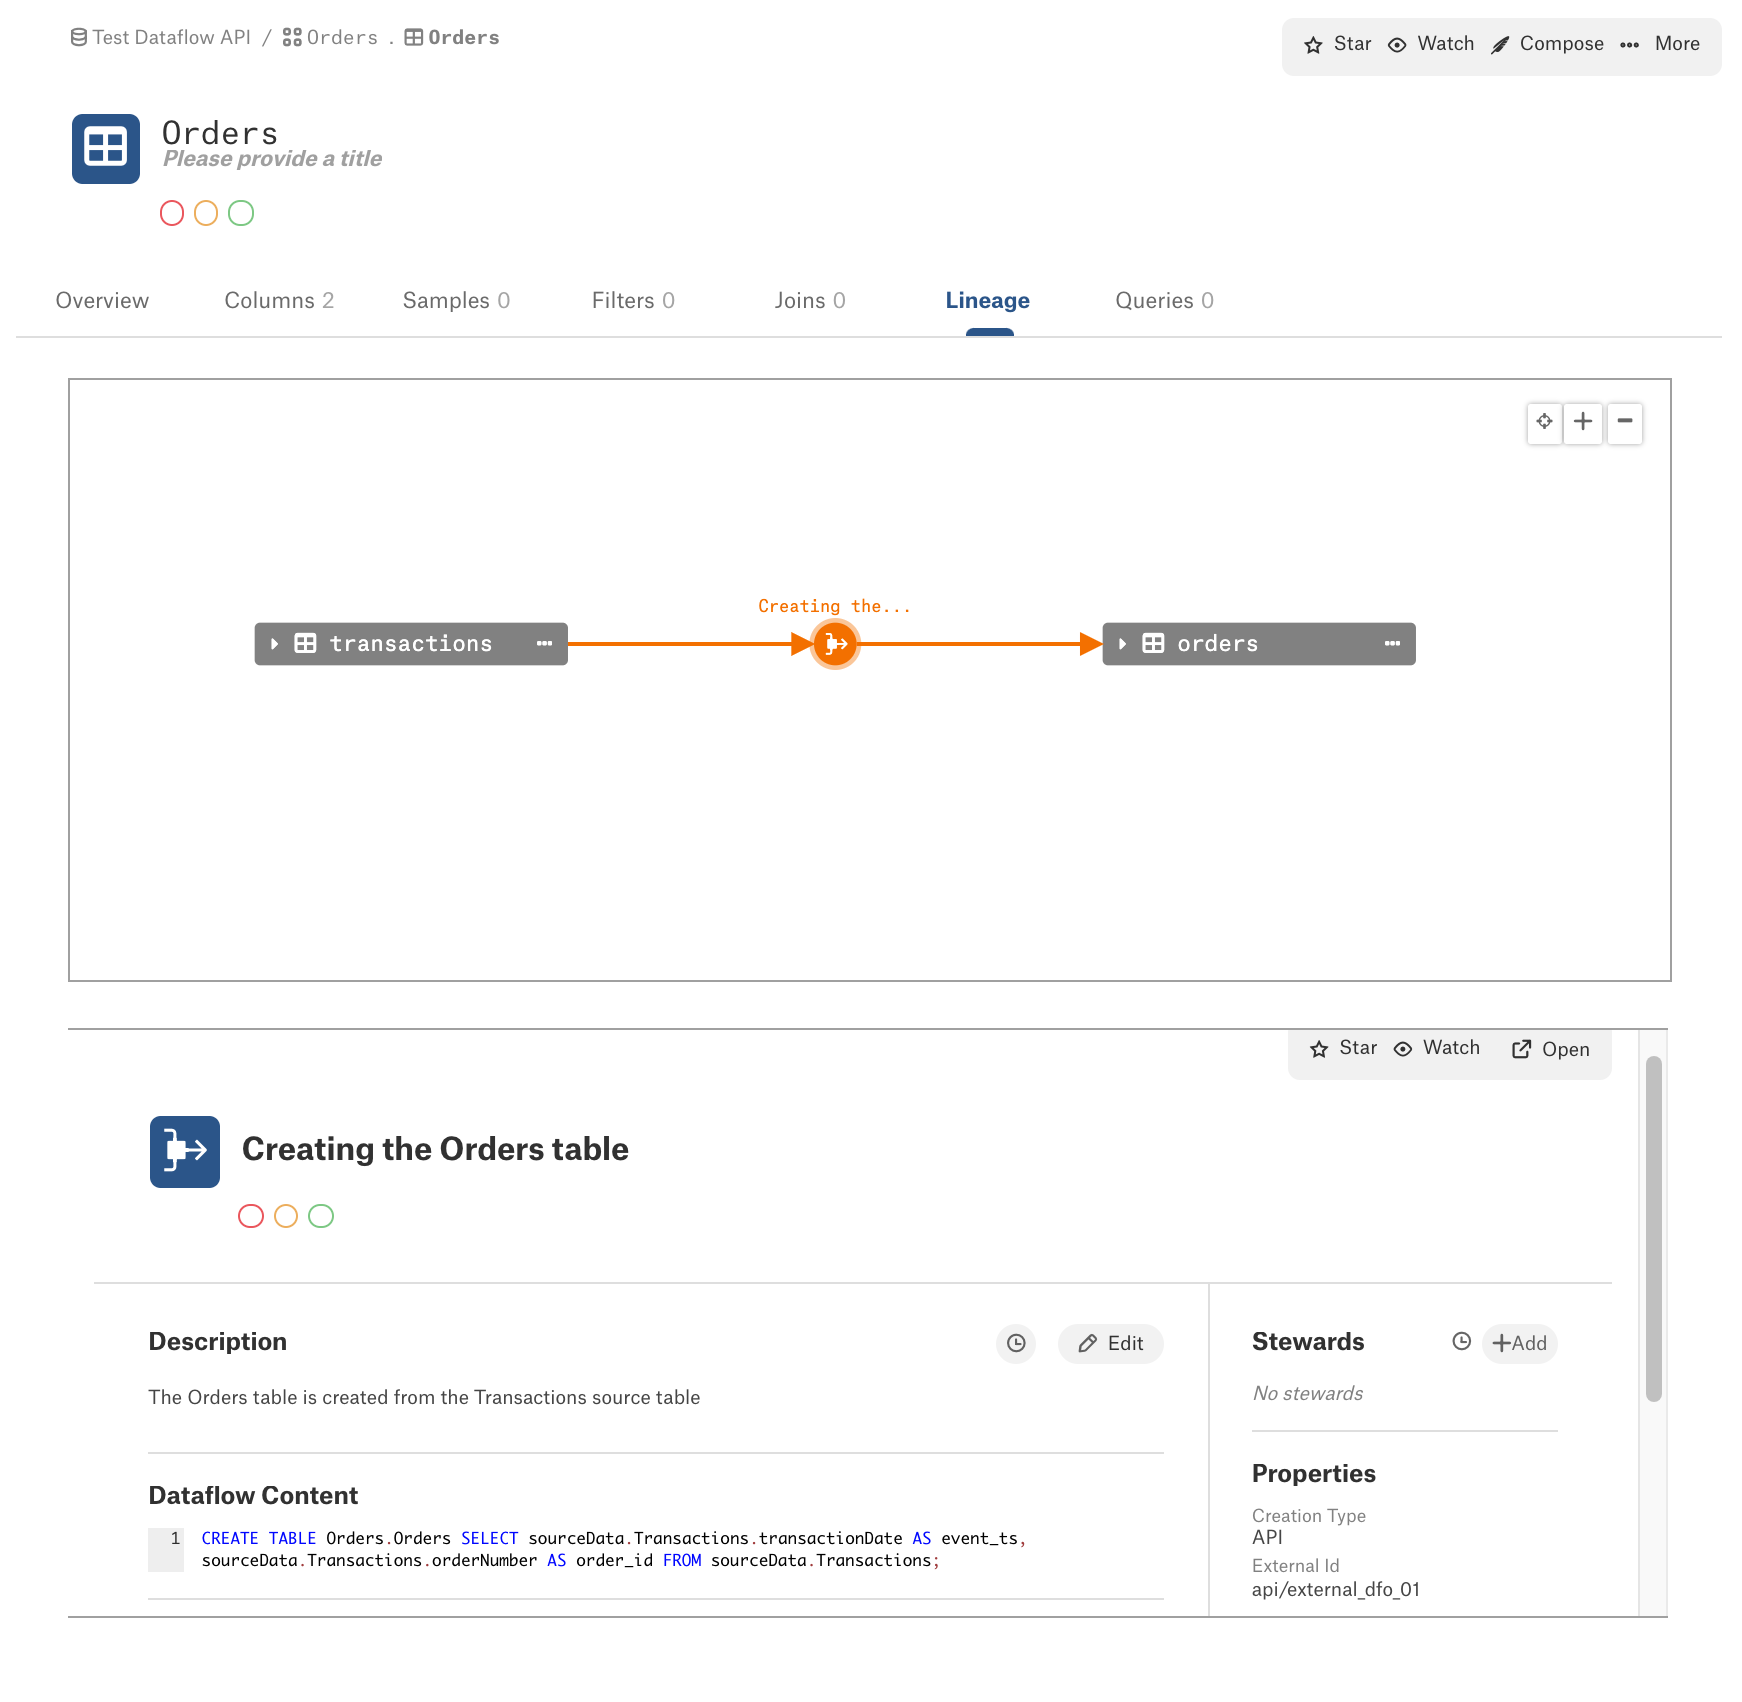
- Click on the dataflow object. In the preview area under the diagram, you will see the catalog page of this dataflow object with the Title, Description, and Dataflow Content fields containing the information loaded with the API. The external_id property is displayed in the Properties section on the right of the page.
Orders, Processing > TeamsAndOrders
Next, we’ll create lineage links taking some data from two source tables at the same time. In the Swagger UI, edit the POST request payload to the following example, substituting the data source ID with the corresponding data source ID from your Alation instance:
{
  "dataflow_objects": [
    {
      "external_id": "api/external_dfo_02",
      "content": "CREATE TABLE reportData.TeamsAndOrders SELECT o.order_id, o.event_ts, p.processedBy, p.teamID AS team_id FROM Orders.Orders o, sourceData.Processing p WHERE o.order_id = p.orderNumber;"
      }
    ],
  "paths": [
            [
              [
                {"otype": "attribute", "key": "<DS_ID>.Orders.Orders.order_id"}
                ],
              [
                {"otype": "dataflow", "key": "api/external_dfo_02"}
                ],
              [
                {"otype": "attribute", "key": "<DS_ID>.reportData.TeamsAndOrders.order_id"}
                ]
              ],
            [
              [
                {"otype": "attribute", "key": "<DS_ID>.Orders.Orders.event_ts"}
                ],
              [
                {"otype": "dataflow", "key": "api/external_dfo_02"}
                ],
              [
                {"otype": "attribute", "key": "<DS_ID>.reportData.TeamsAndOrders.event_ts"}
                ]
            ],
          [
            [
              {"otype": "attribute", "key": "<DS_ID>.sourceData.Processing.processedBy"}
              ],
            [
              {"otype": "dataflow", "key": "api/external_dfo_02"}
              ],
            [
              {"otype": "attribute", "key": "<DS_ID>.reportData.TeamsAndOrders.processedBy"}
              ]
            ],
          [
            [
              {"otype": "attribute", "key": "<DS_ID>.sourceData.Processing.teamID"}
              ],
            [
              {"otype": "dataflow", "key": "api/external_dfo_02"}
              ],
            [
              {"otype": "attribute", "key": "<DS_ID>.reportData.TeamsAndOrders.team_id"}
              ]
            ]
          ]
        }
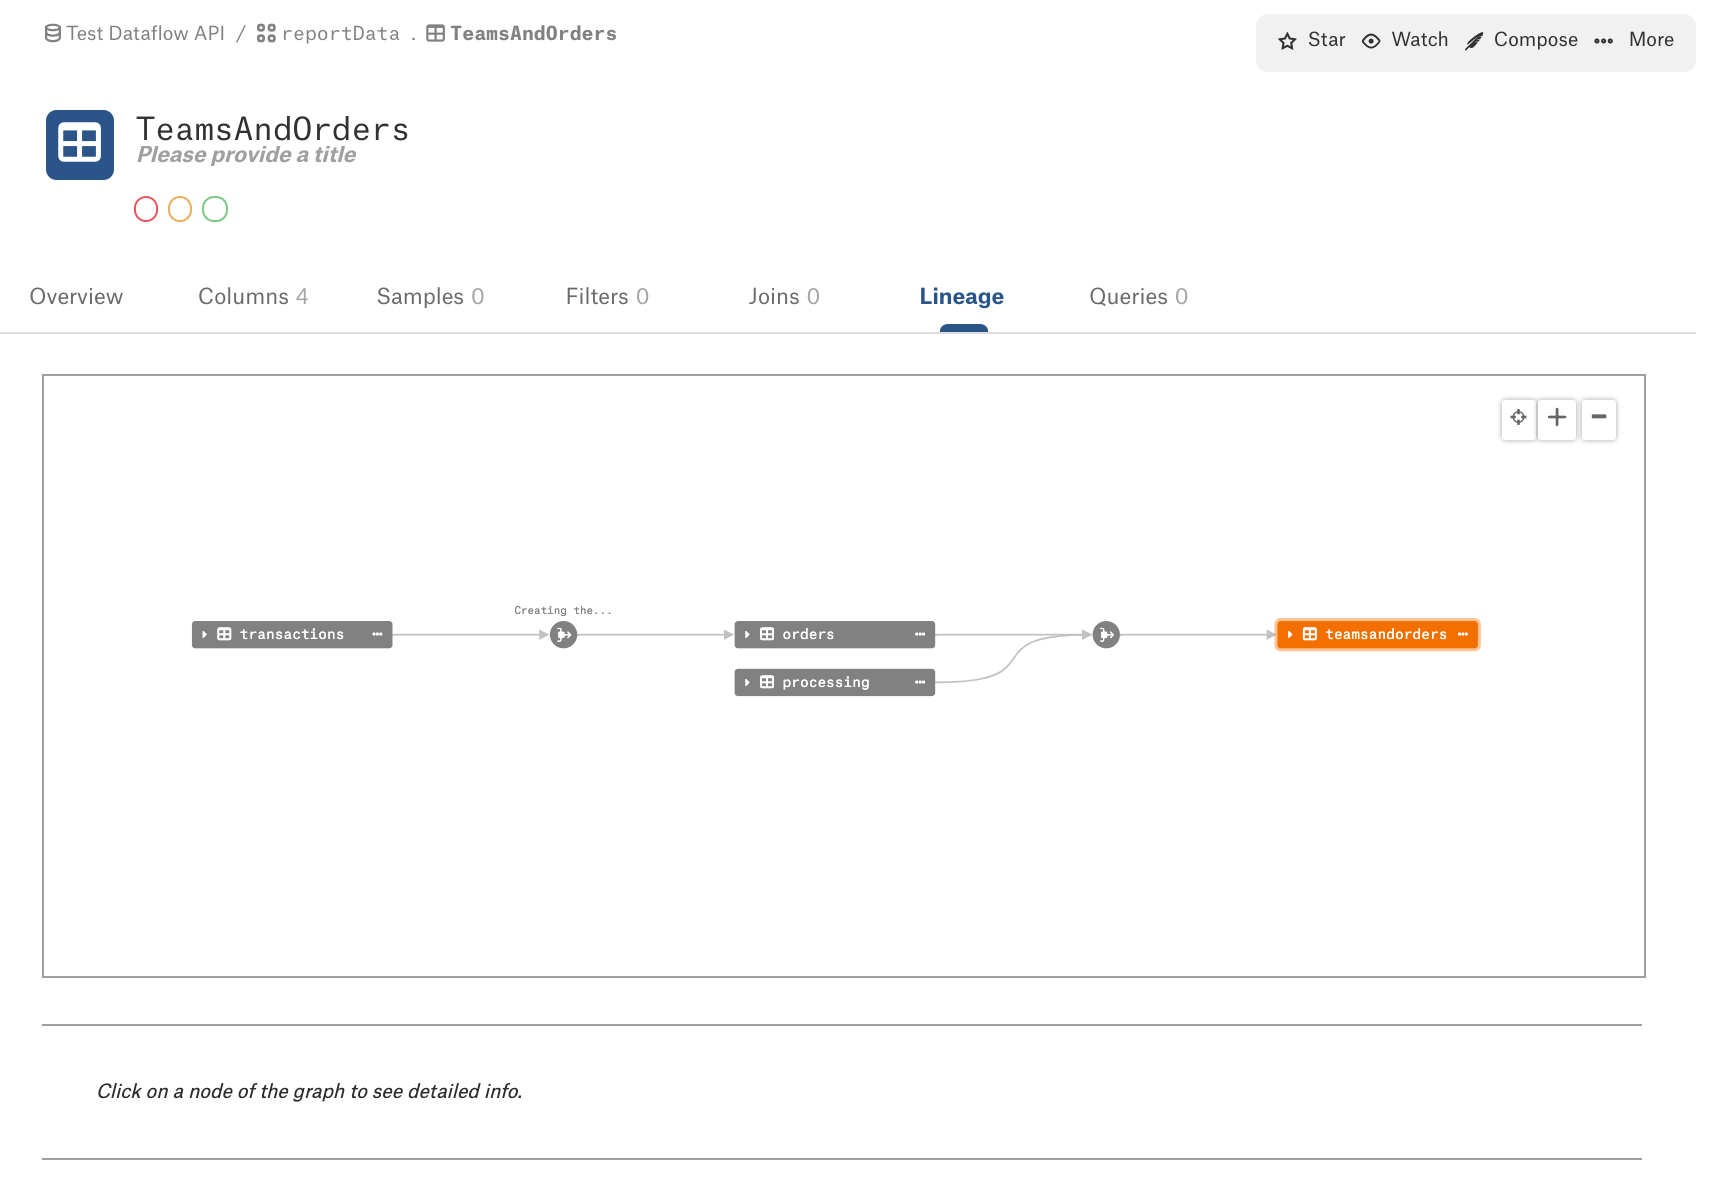
In Alation, navigate to your data source > reportData > TeamsAndOrders table and open the Lineage tab which will now be enabled. The lineage diagram will show the data you uploaded with the API:
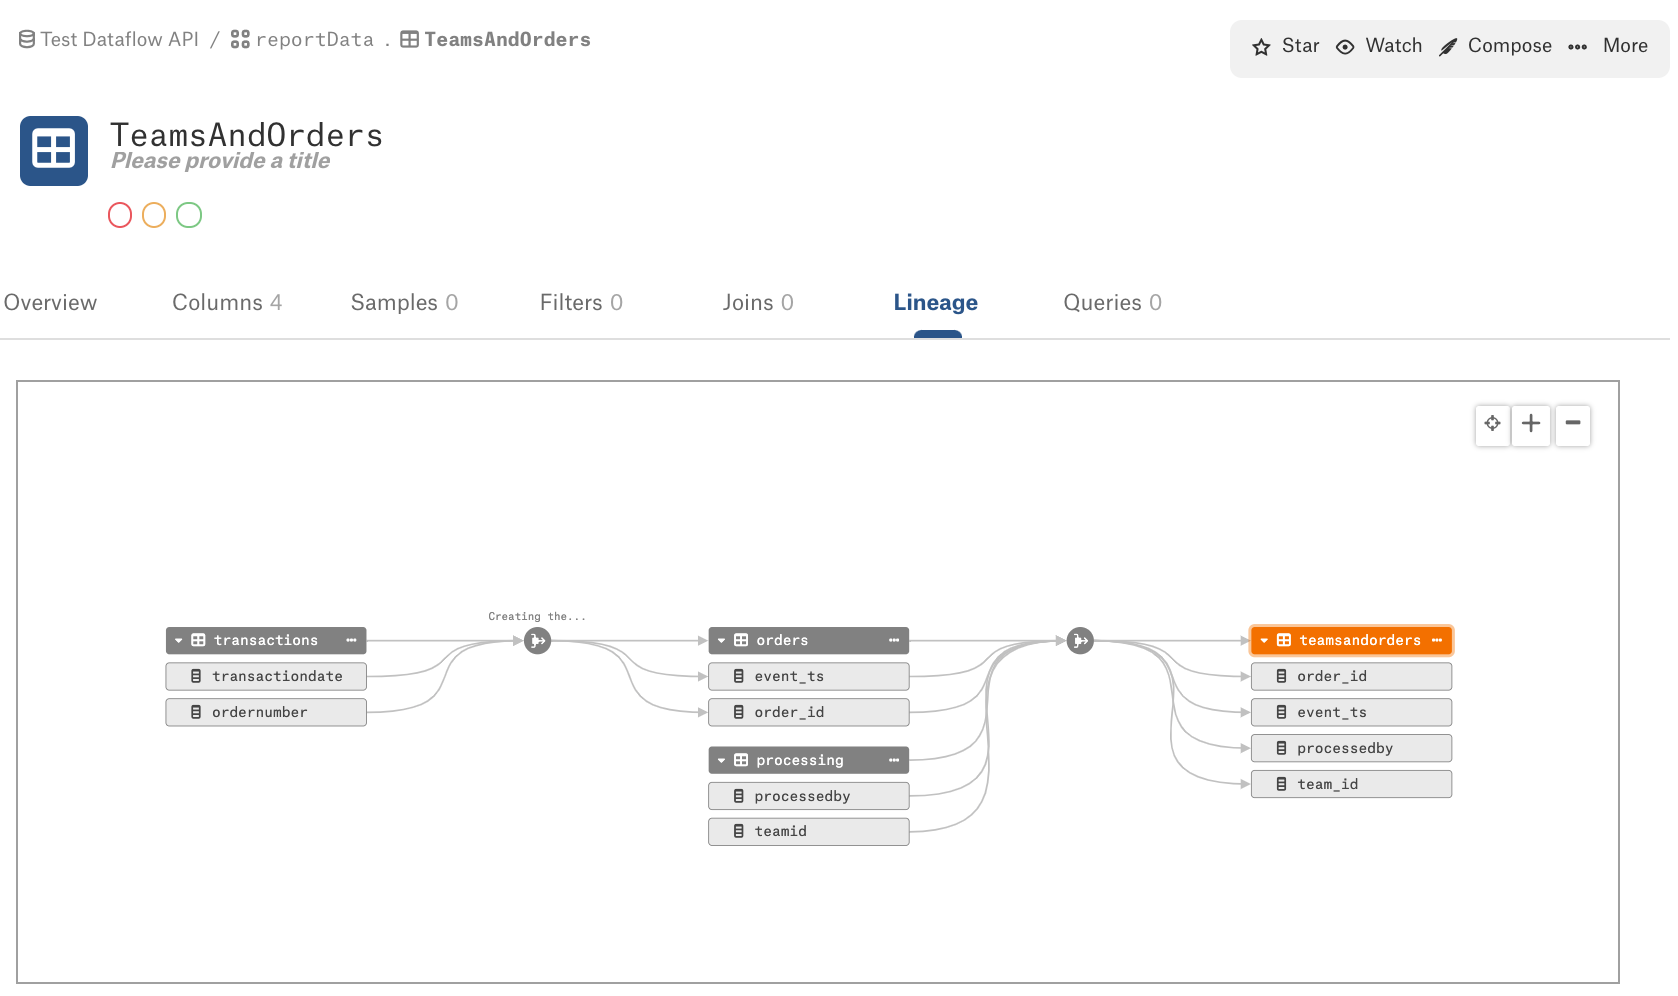
Expand the table nodes to display the column-level lineage data:
Click on the dataflow object between the Orders and TeamsAndOrders tables to view its catalog information in the preview area under the diagram:
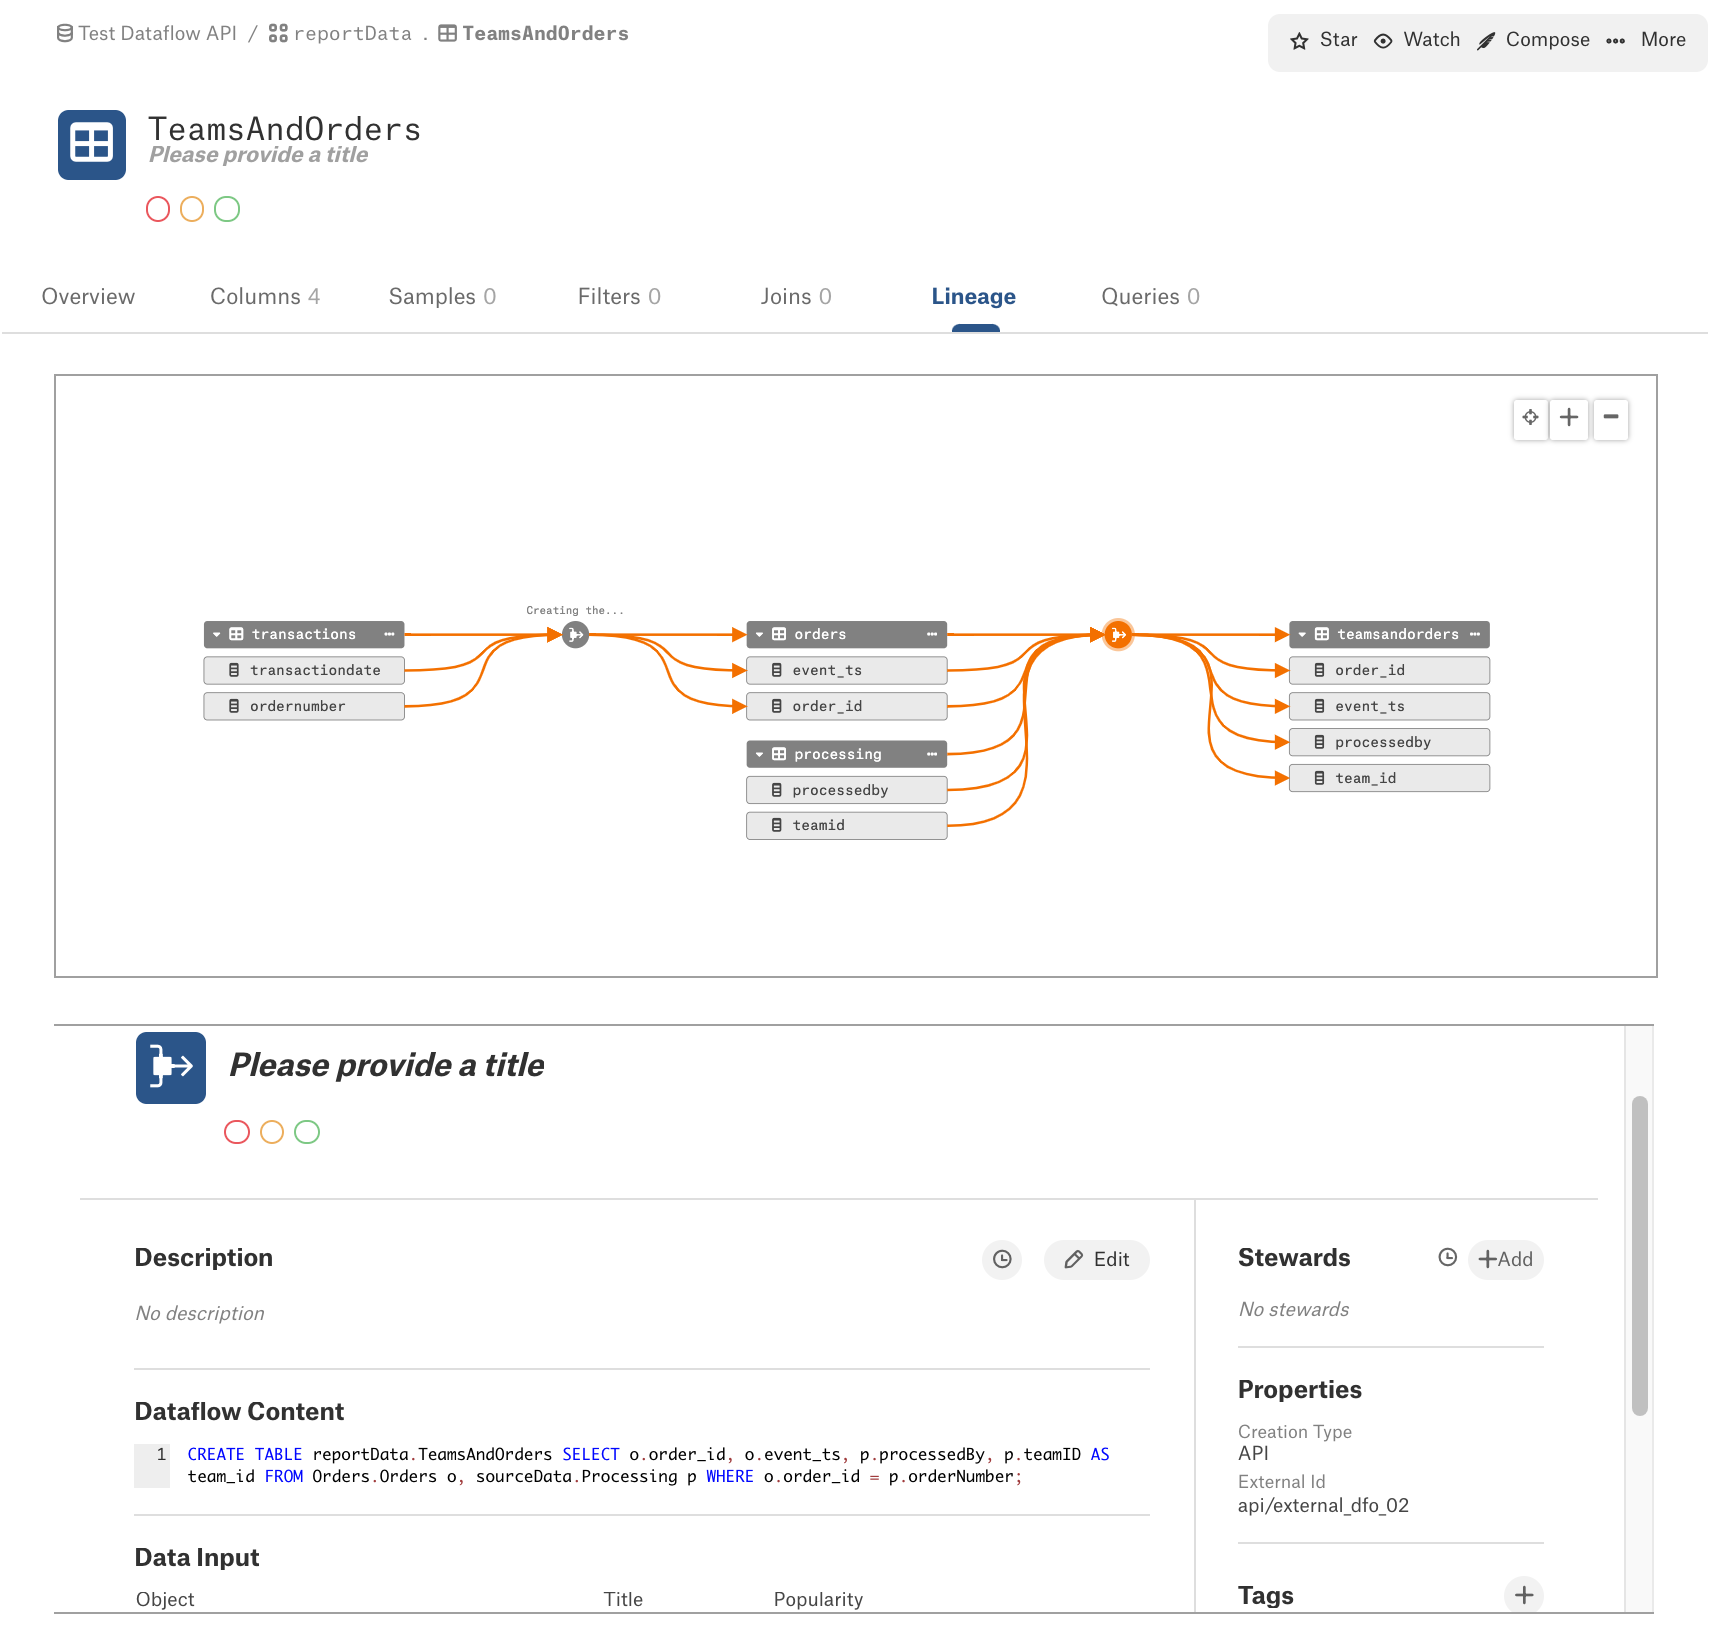
This dataflow object does not have a Title or Description yet. They can either be added in the Catalog or we can use the PATCH request of the Dataflow API to load this data.
Get Dataflow Information
Next, we’ll try out the GET request to retrieve dataflow object information.
- In the Swagger UI, click the GET request to expand this section.
- Locate the Parameters section. There are 3 parameters:
- keyField
- limit
- skip
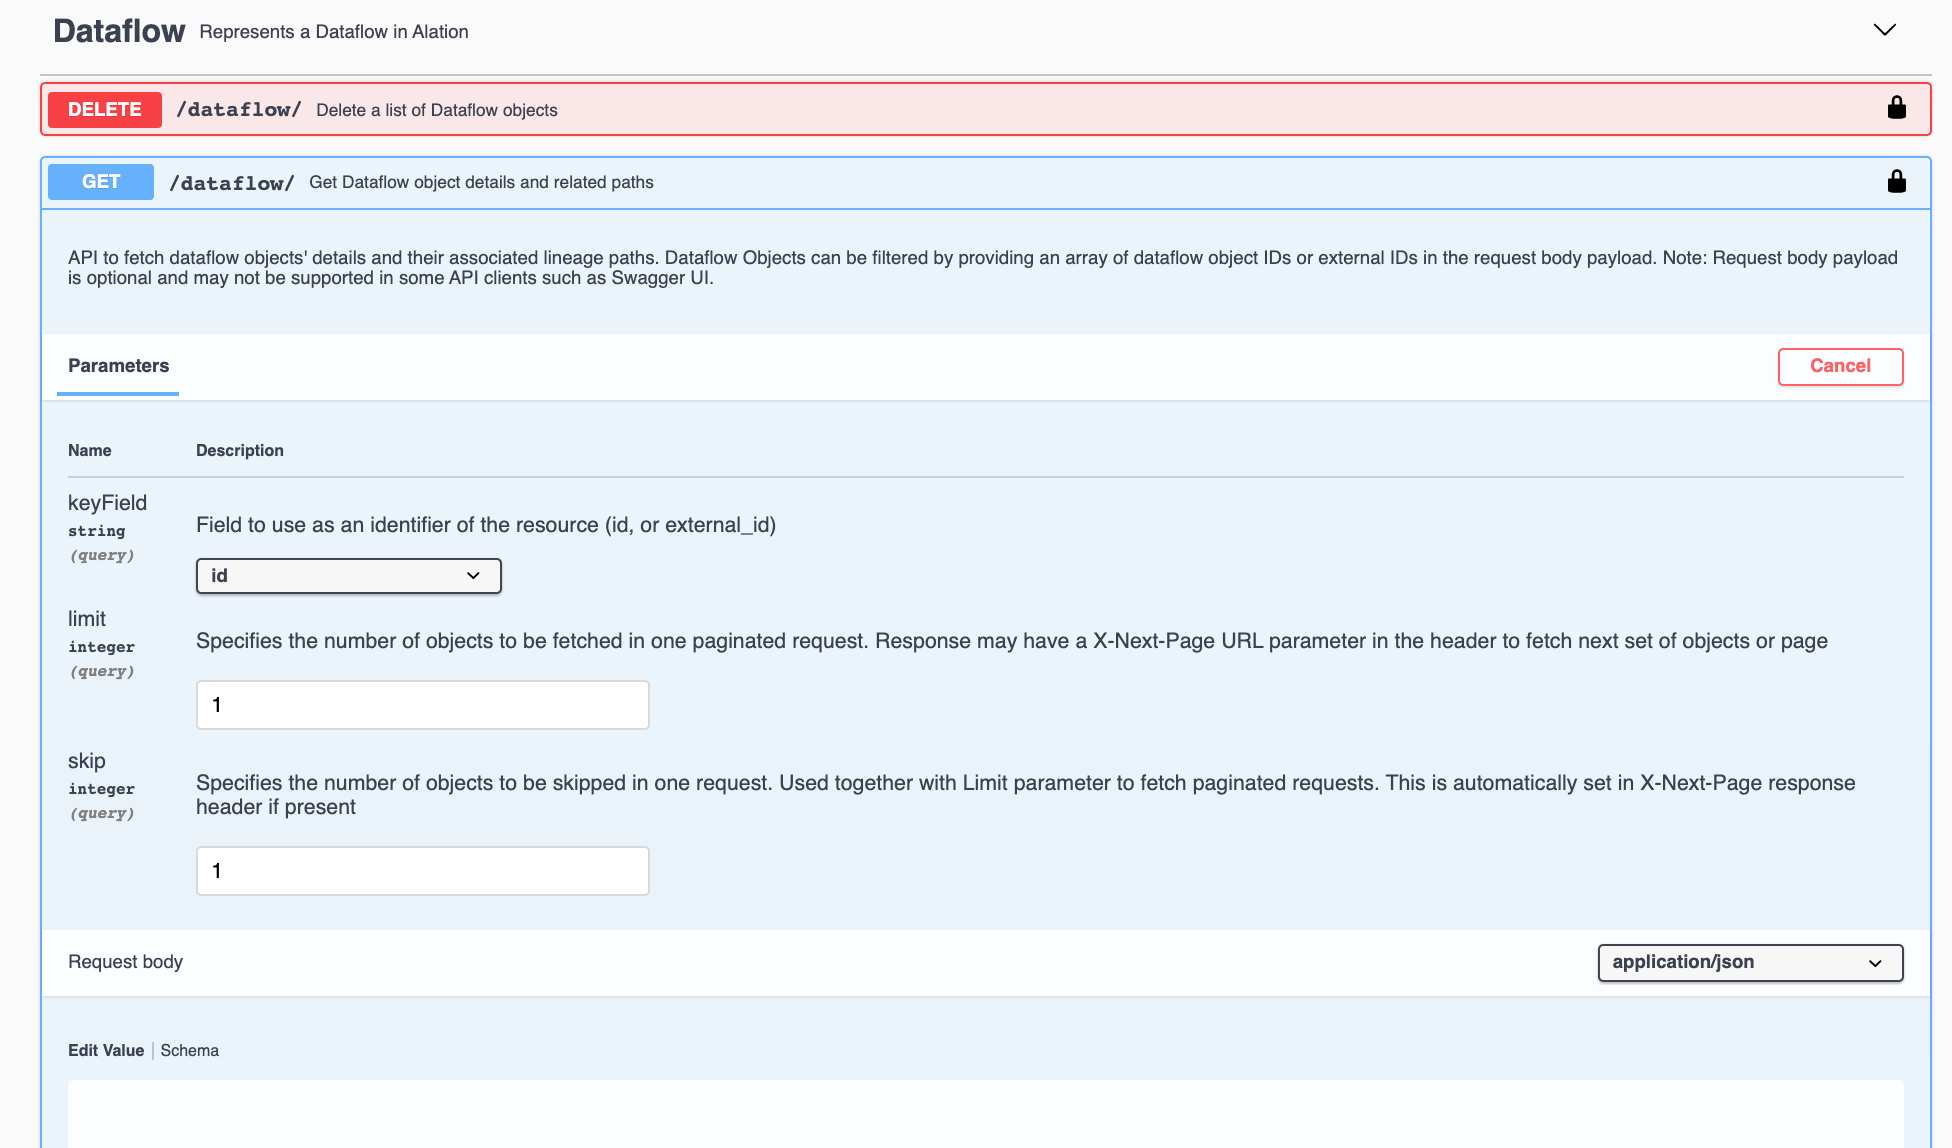
The keyField parameter has no effect on calls done with Swagger UI. But you can use the limit and skip parameters to limit the response. The GET request response is paginated. Each response page fetches as many dataflow objects as specified by the limit parameter. To retrieve data on the N page of the response, the skip should be set to N.
- Click Try it Out on the right.
4. Set the limit parameter to 1.
5. Clear the example text from the request body.
6. Click Execute. This will retrieve the information about one dataflow object and the associated lineage paths per response page.
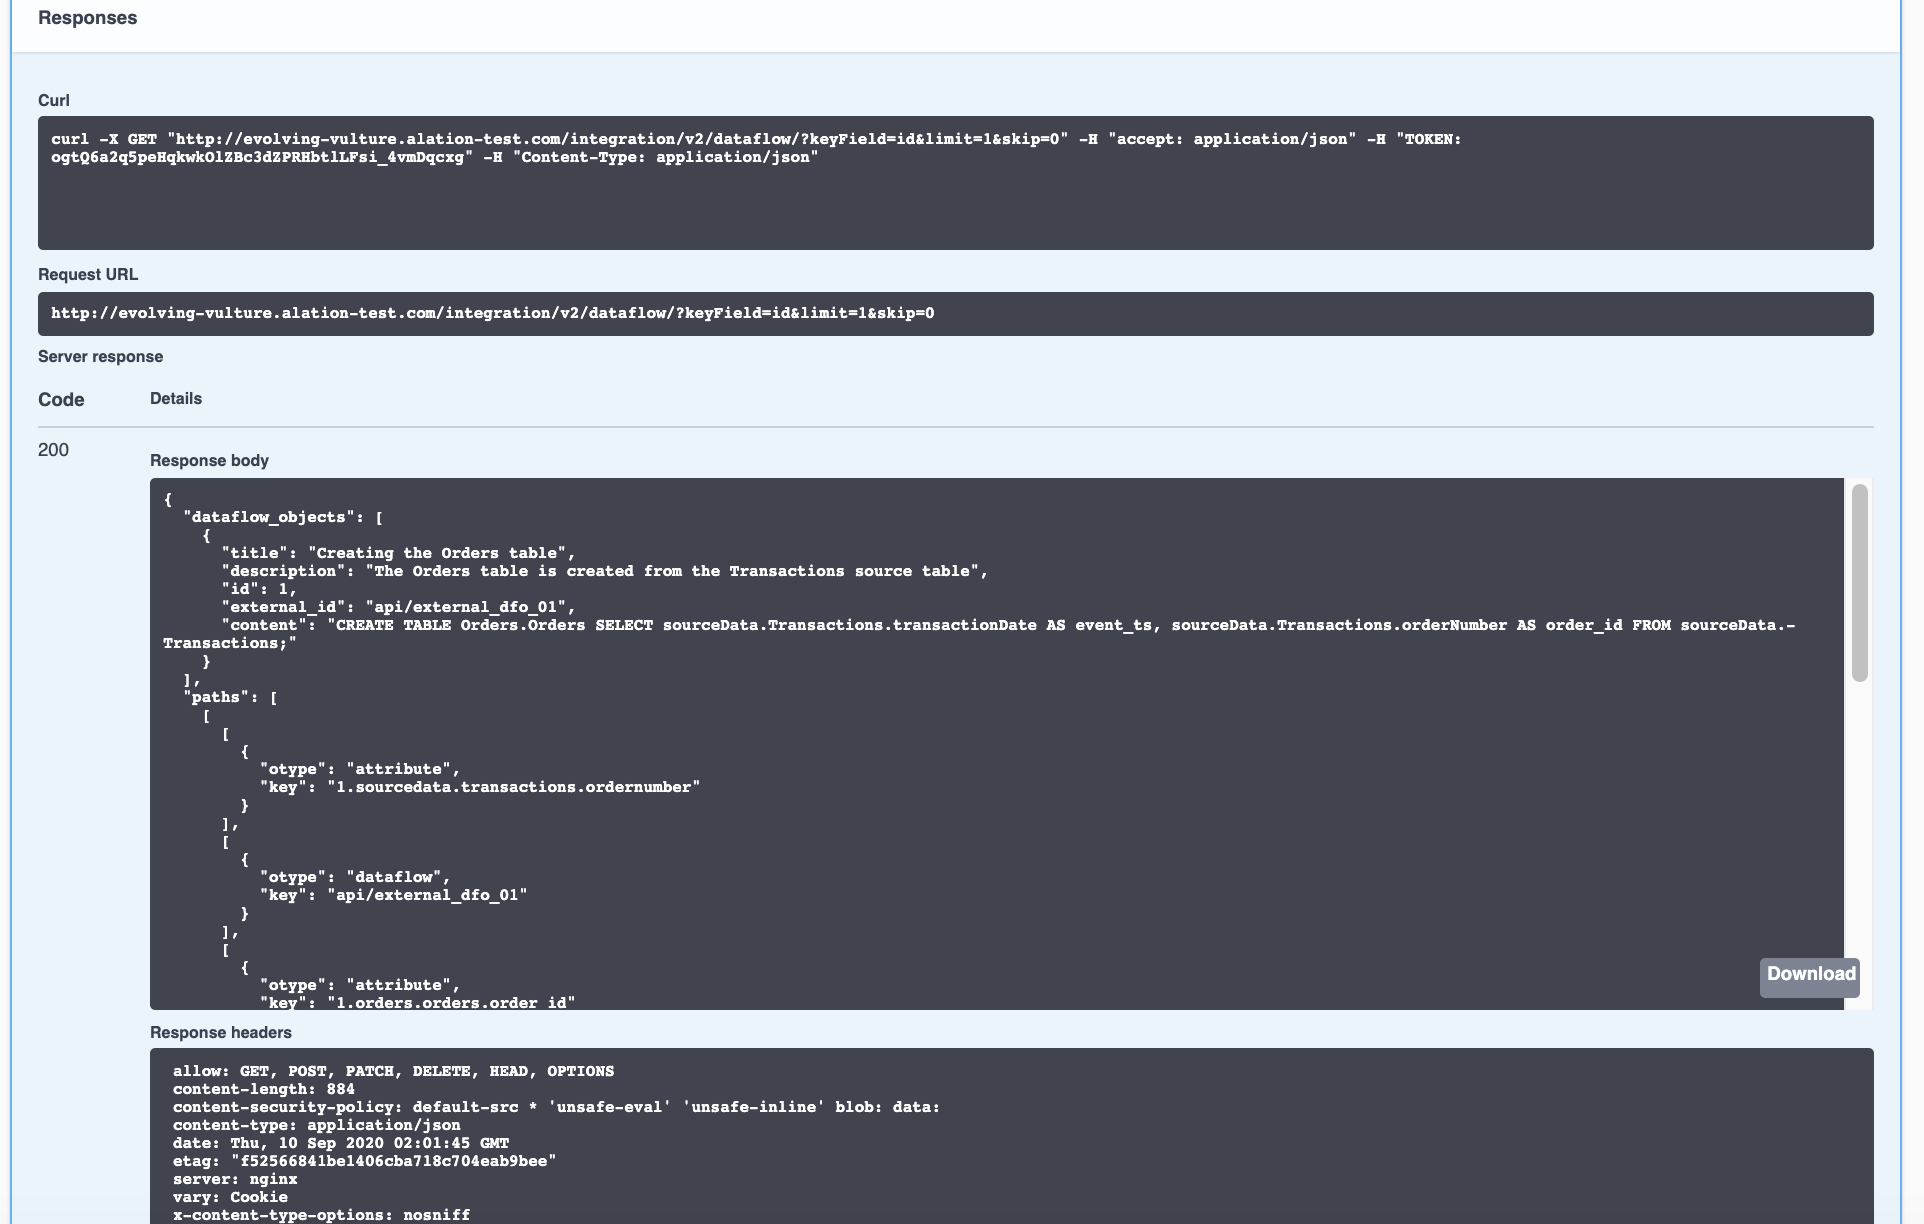
- To retrieve information about a specific dataflow object, we’ll need to use Postman because of the Swagger limitation on the GET request body.
NoteOAS 3.0 in Swagger does not support a request body for GET calls. To retrieve information about specific Dataflow objects, use API software, such as Postman, which allows filtering the response on specific parameters.
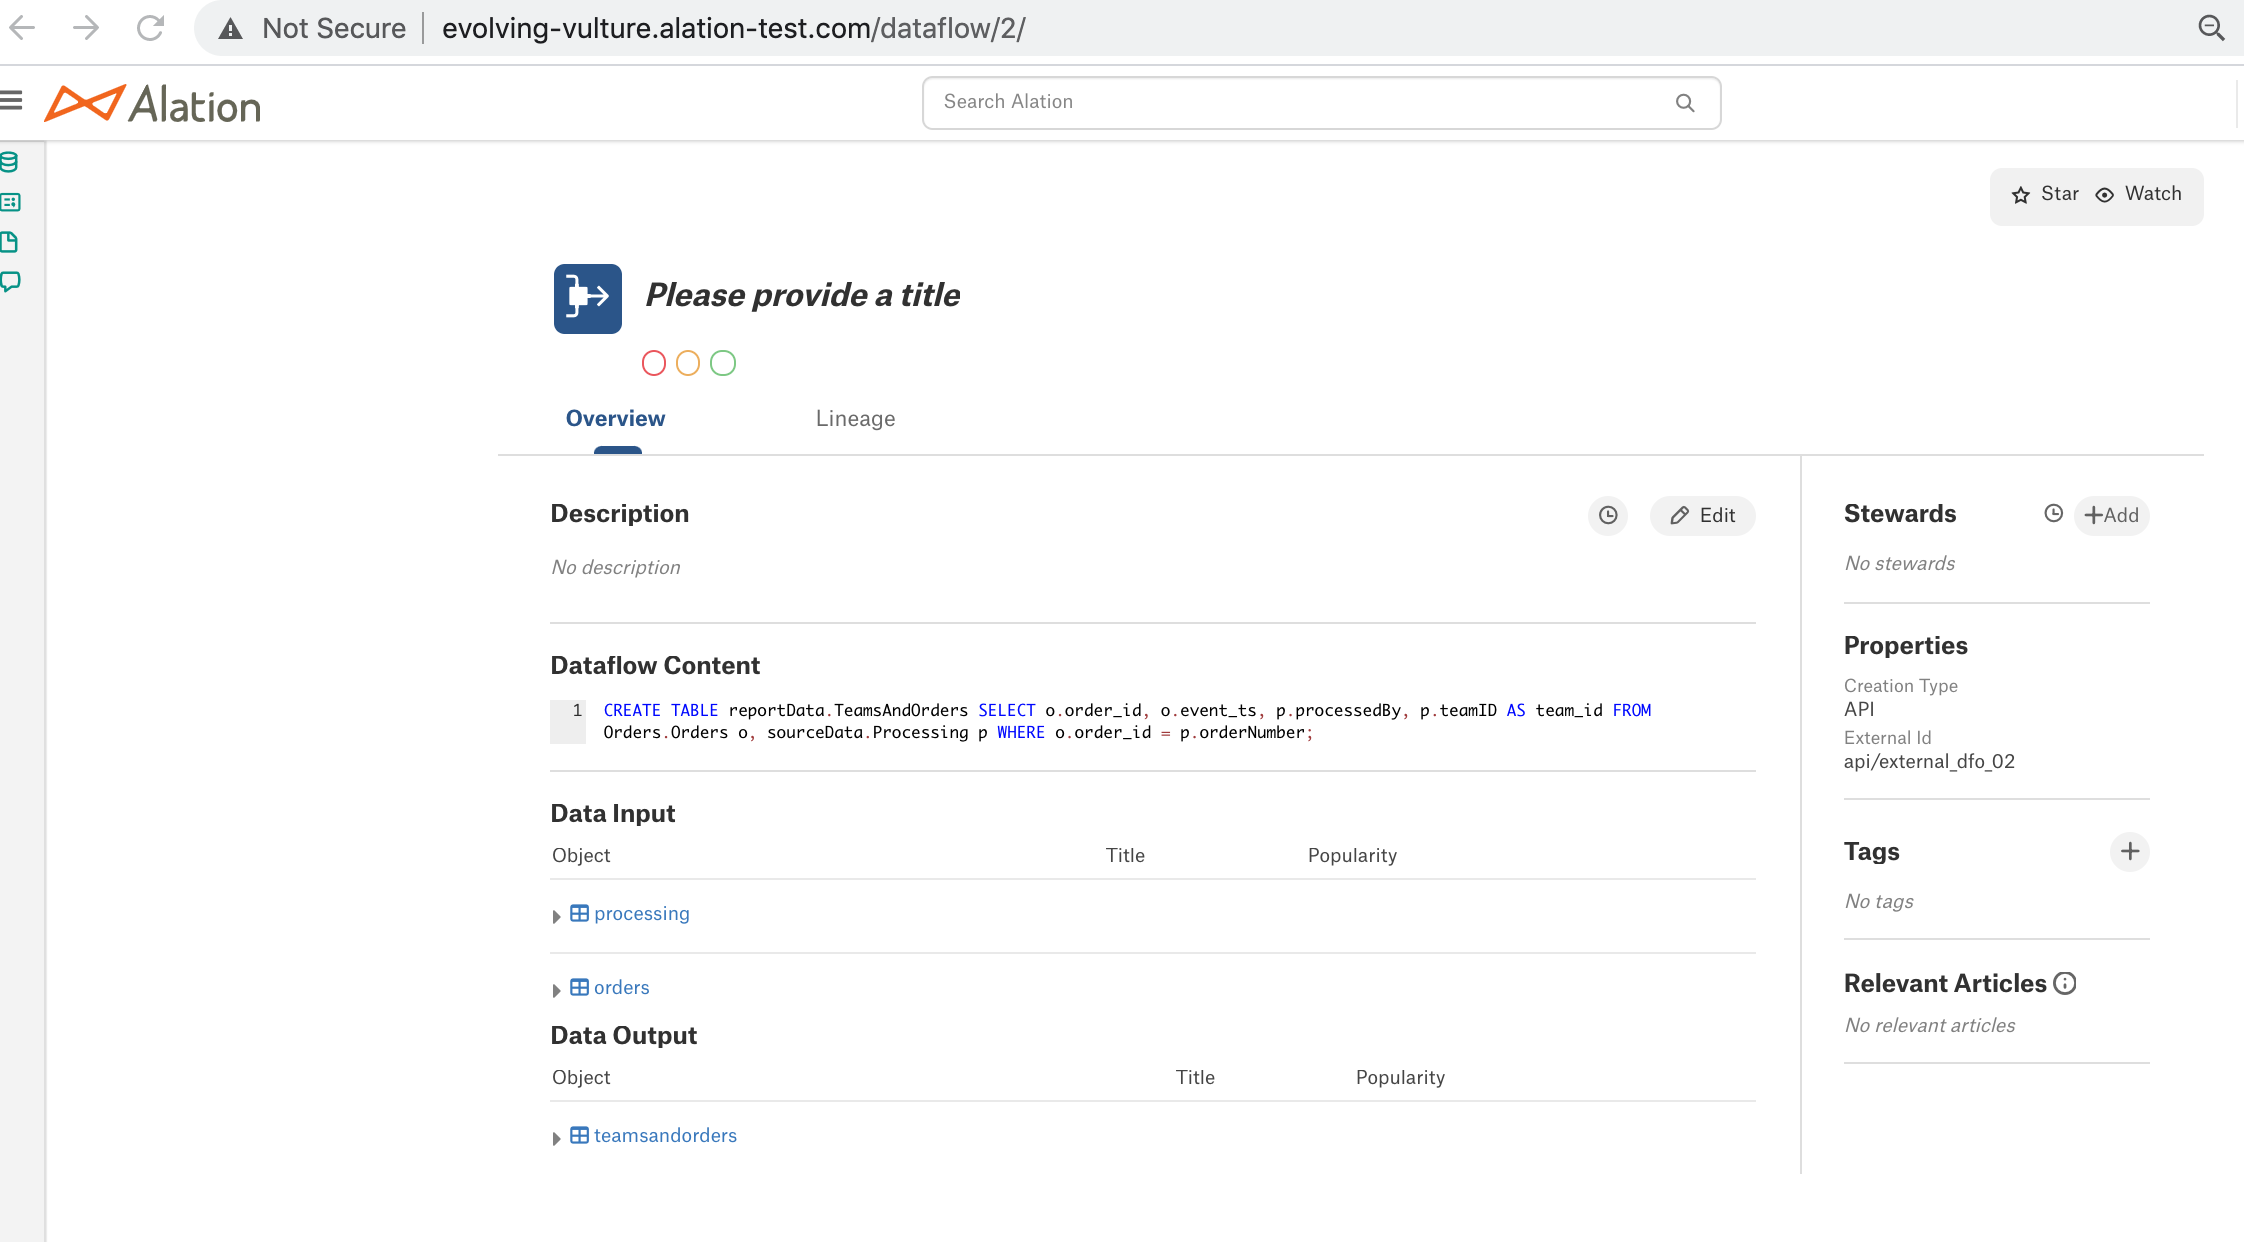
- To filter the response to a specific dataflow object and its paths, use the keyField parameter, which can either accept the values of the object id or external_id of a dataflow object. To find out the id or the external_id values for a dataflow object, open its page in the Catalog:
* The id is available in the object URL after the object type. For example, in the URL http://evolving-vulture.alation-test.com/dataflow/2/, 2 is the required id.
* The external_id can be found in the Properties section:
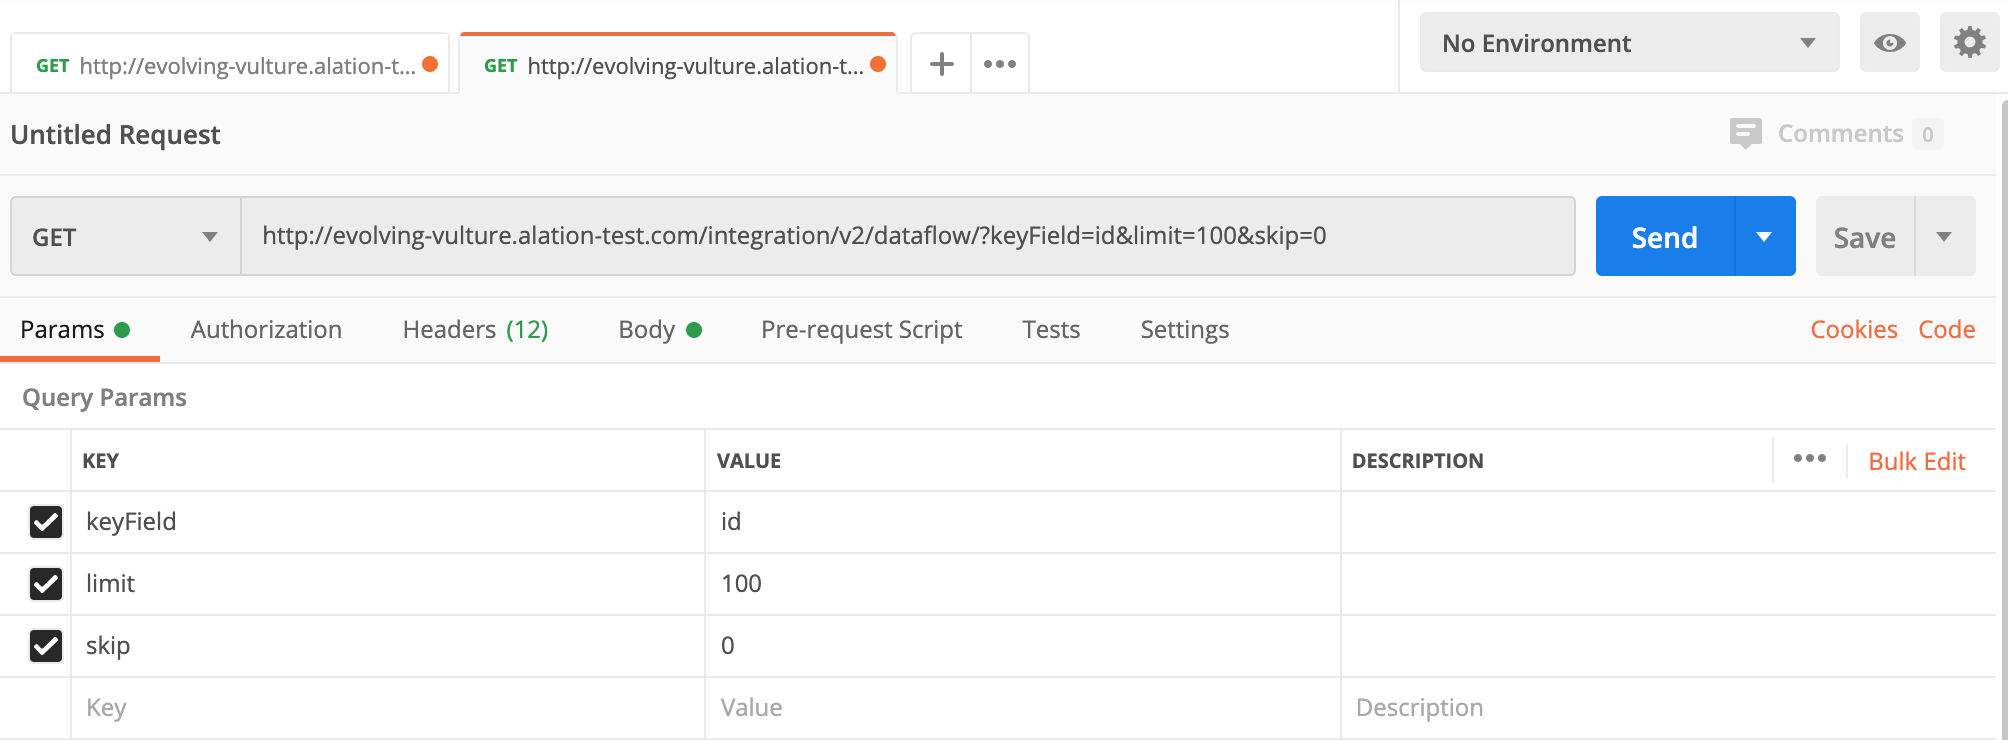
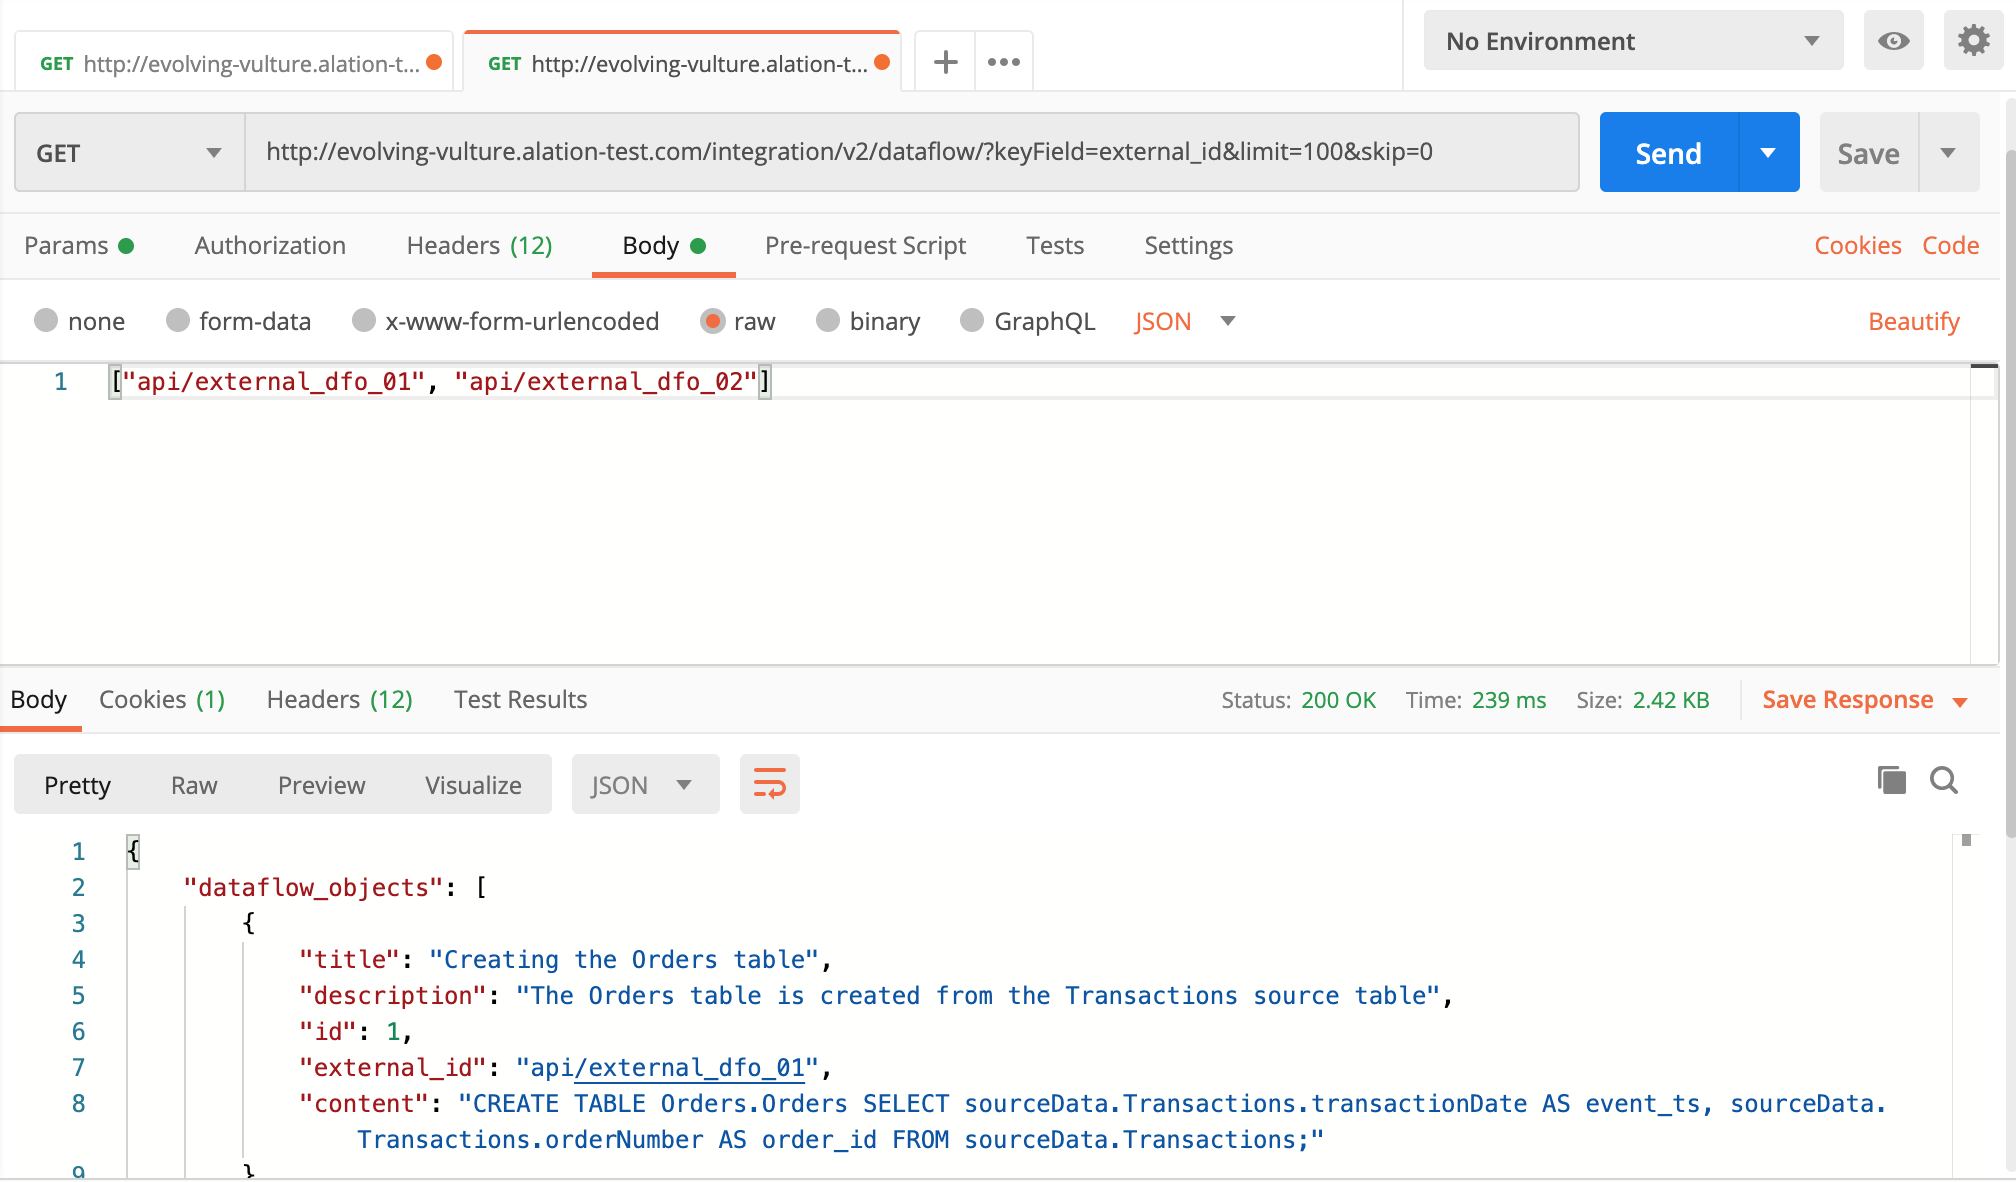
- In Postman, create a new GET request to the <your_Alation_URL>/integration/v2/ endpoint using the parameters for the Dataflow GET request. If you set the keyField parameter to use the id value, you will need to specify the object id in the request body. If you are using the external_id value, specify the external_id in the body:
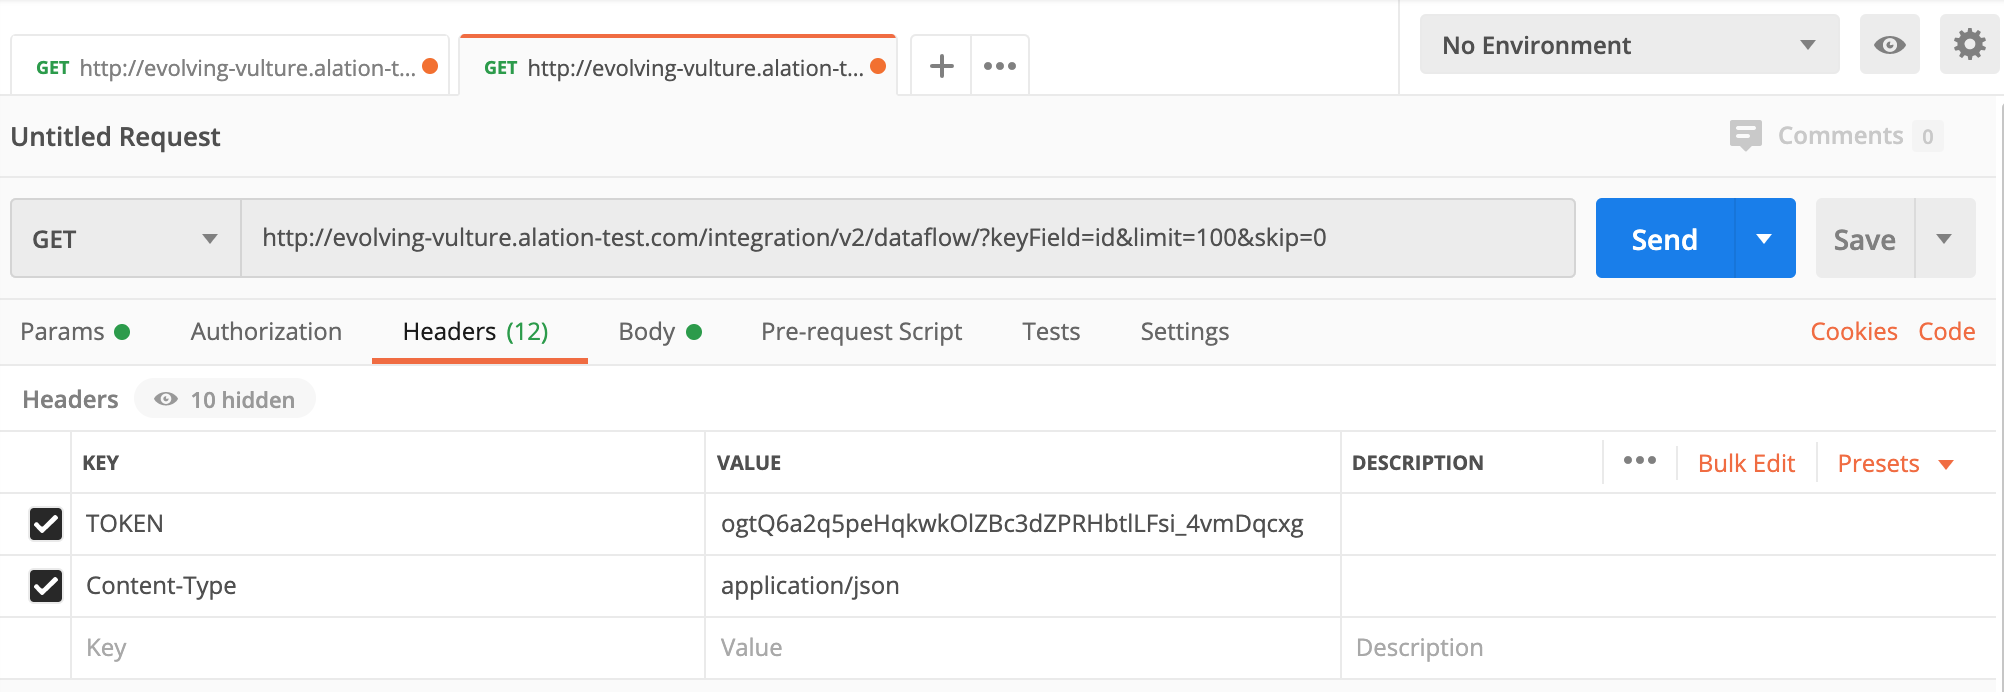
- Specify the TOKEN and the Content-Type in the Header:
- In the request body, specify the id or the external_id of the dataflow objects you wish to retrieve. You can specify multiple values, separating them with a comma.
NoteIf you choose to retrieve information using the external_id, set the keyField parameter to external_id and specify the external_id inside quotation marks: [“api/external_dfo_01”]
- Send the request. The response will return the dataflow object with the id you have specified and its associated lineage paths.
Update Dataflow Objects
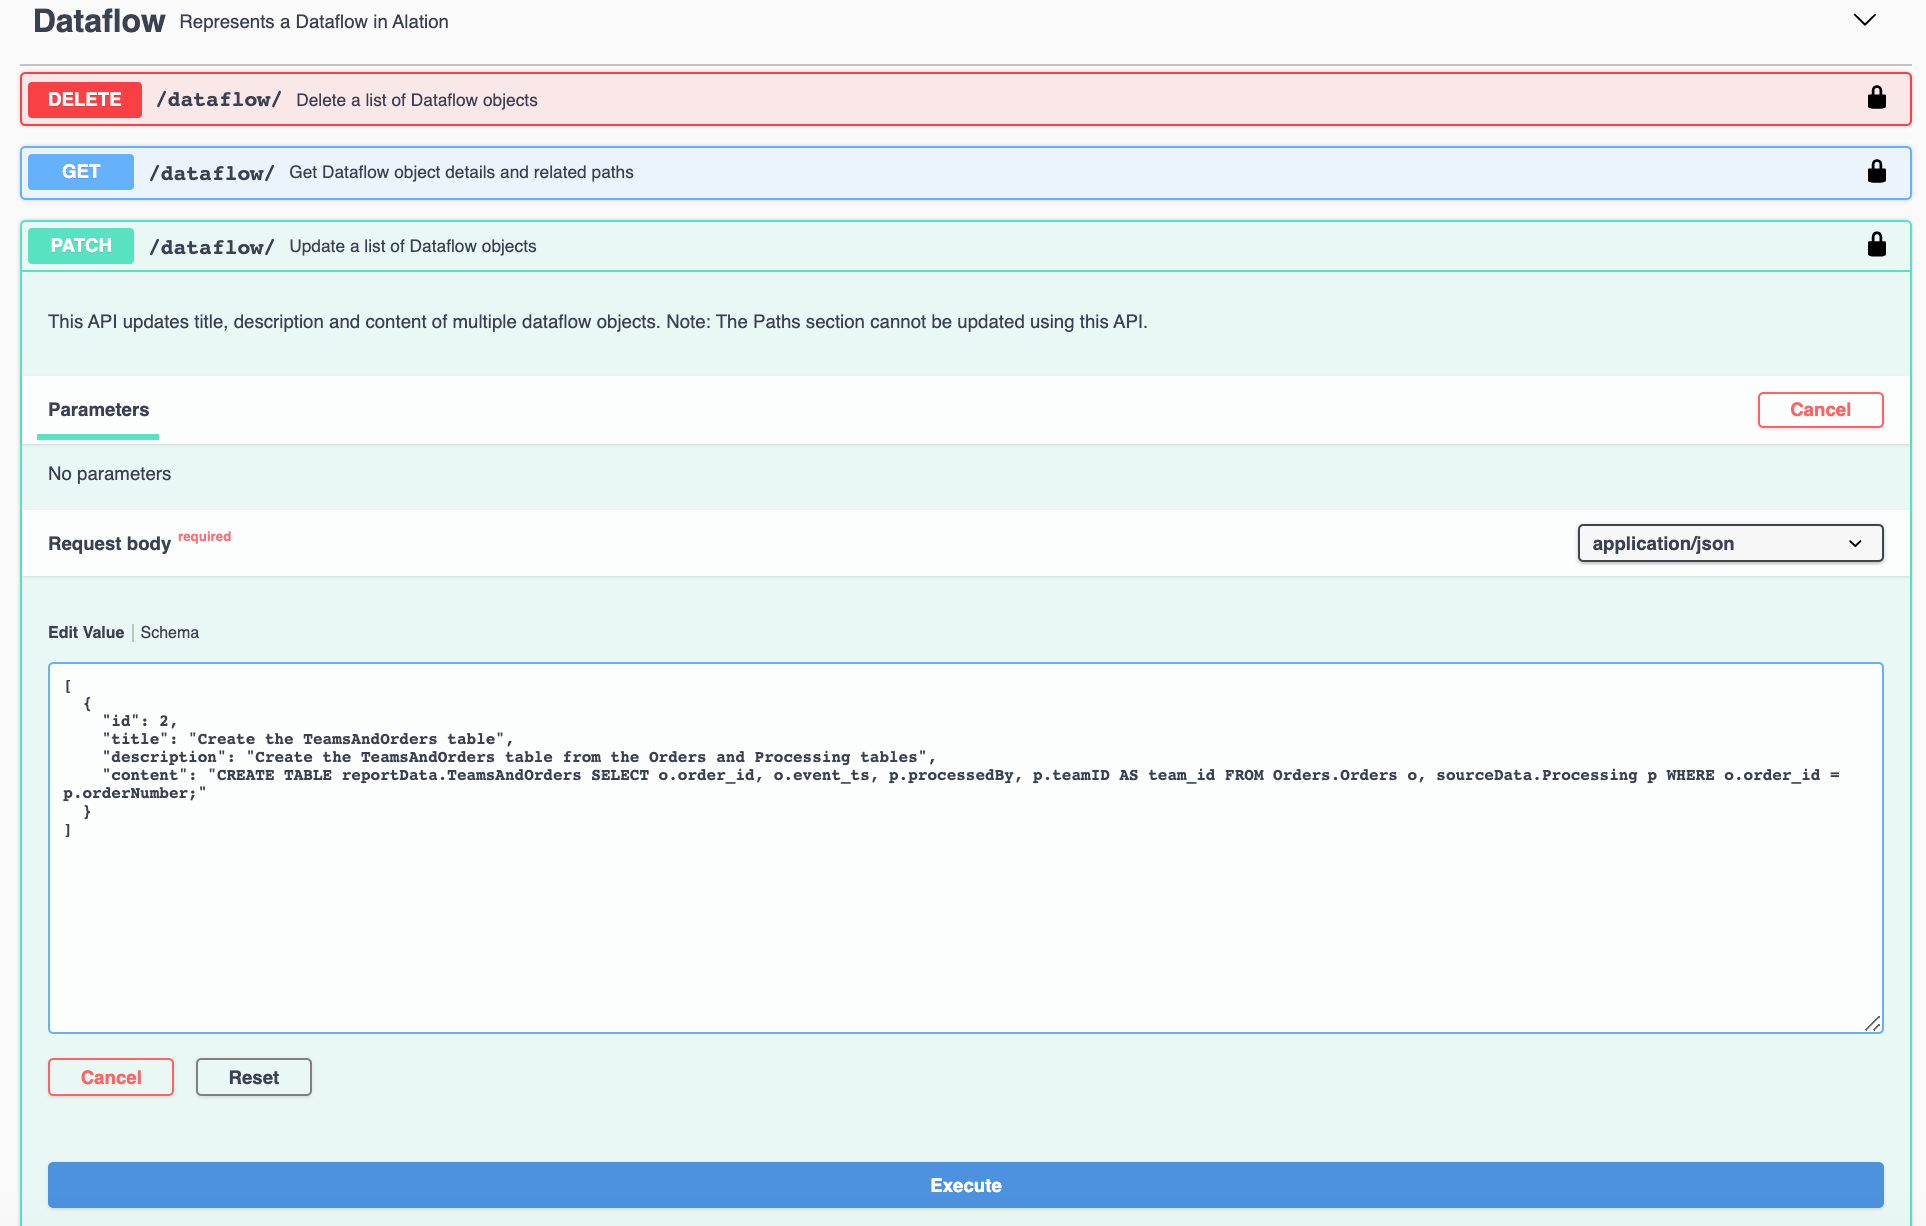
Next, we’ll make some changes to one of the dataflow objects we loaded to try out the PATCH request of the Dataflow API.
In the Swagger UI, click the PATCH request and then click Try it Out on the right. Paste the following payload, substituting the id value with the corresponding dataflow id value from your Alation instance:
[
  {
    "id": 2,
    "title": "Create the TeamsAndOrders table",
    "description": "Create the TeamsAndOrders table from the Orders and Processing tables",
    "content": "CREATE TABLE reportData.TeamsAndOrders SELECT o.order_id, o.event_ts, p.processedBy, p.teamID AS team_id FROM Orders.Orders o, sourceData.Processing p WHERE o.order_id = p.orderNumber;"
    }
  ]
NoteYou can find the id in the URL of the Alation Catalog page of the object. For example, in the URL http://evolving-vulture.alation-test.com/dataflow/2/, 2 is the required id.
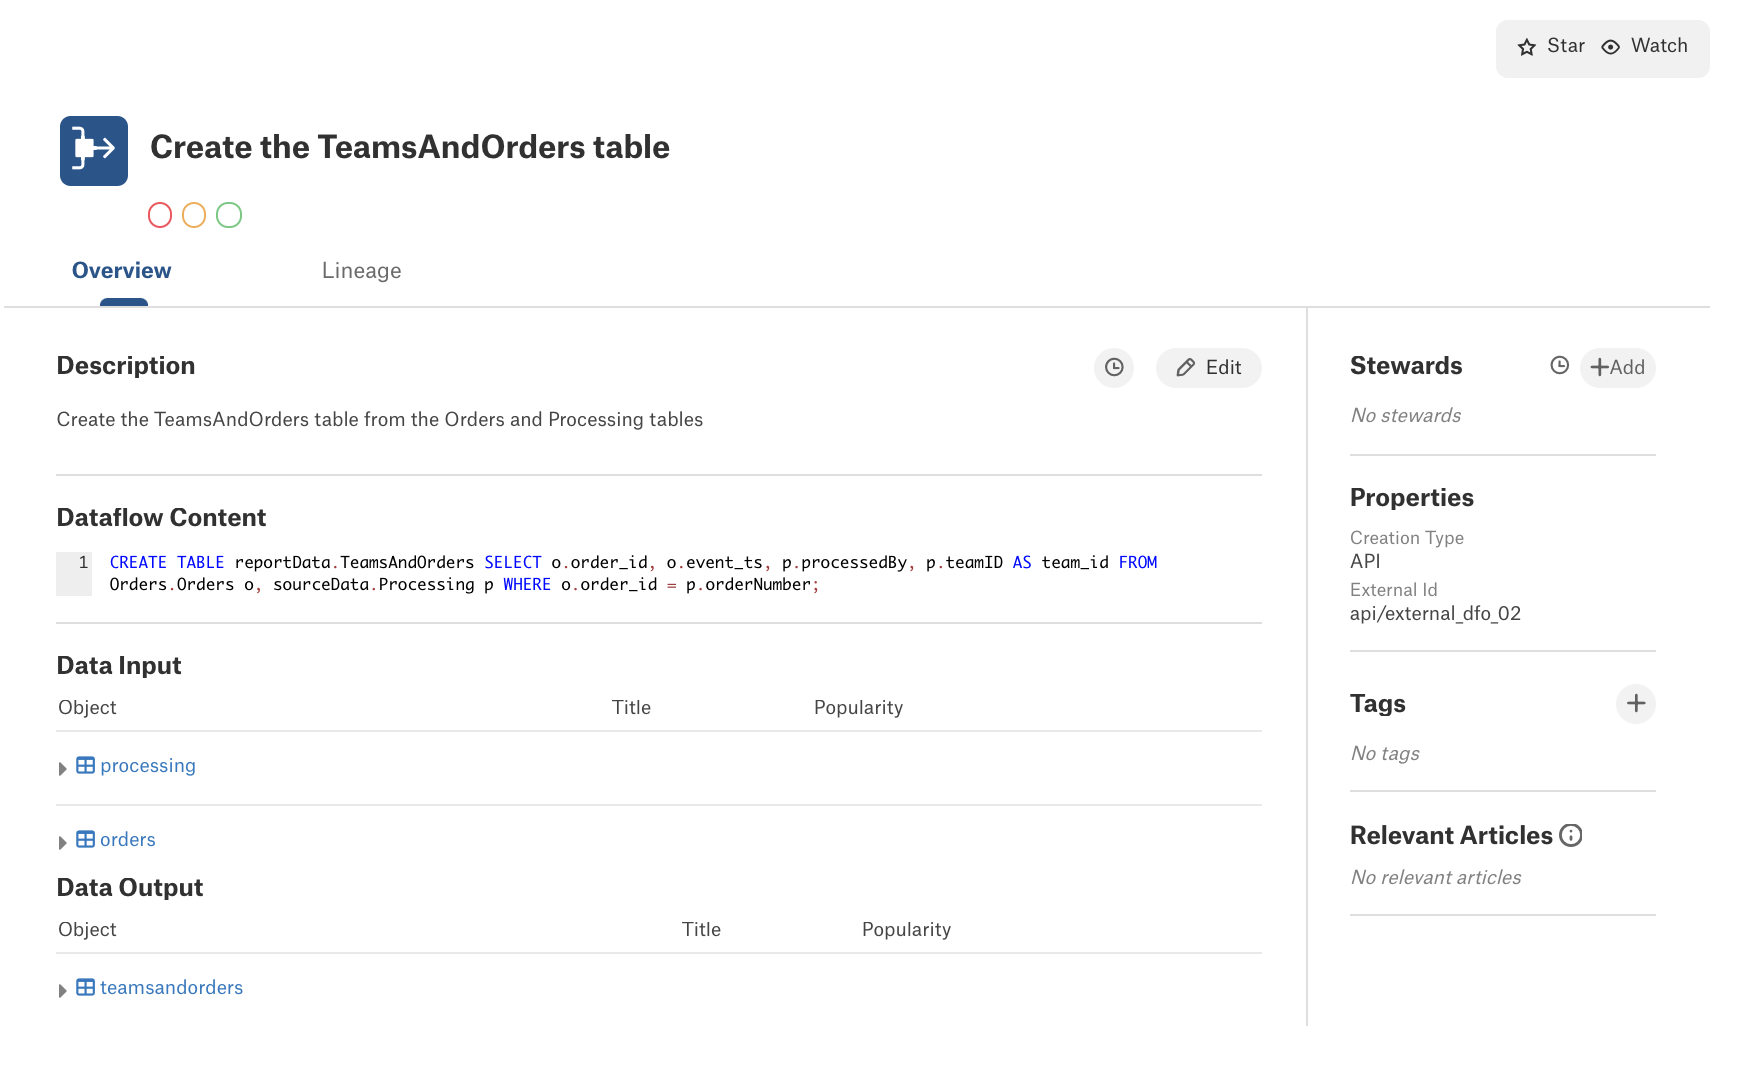
In Alation, check the page of this dataflow object. It now has the corresponding fields filled with values:
Delete
To delete a dataflow object and the lineage paths associated with it, use the DELETE call of the Dataflow API. Let’s delete the dataflow object with the external_id = api/external_dfo_01 that we created.
- In Swagger UI, click the DELETE request and then click Try it Out.
- Set the keyField parameter to external_id.
- Clear the example text from the request body and specify the external_id of the dataflow object to be deleted: ["api/external_dfo_01"]:
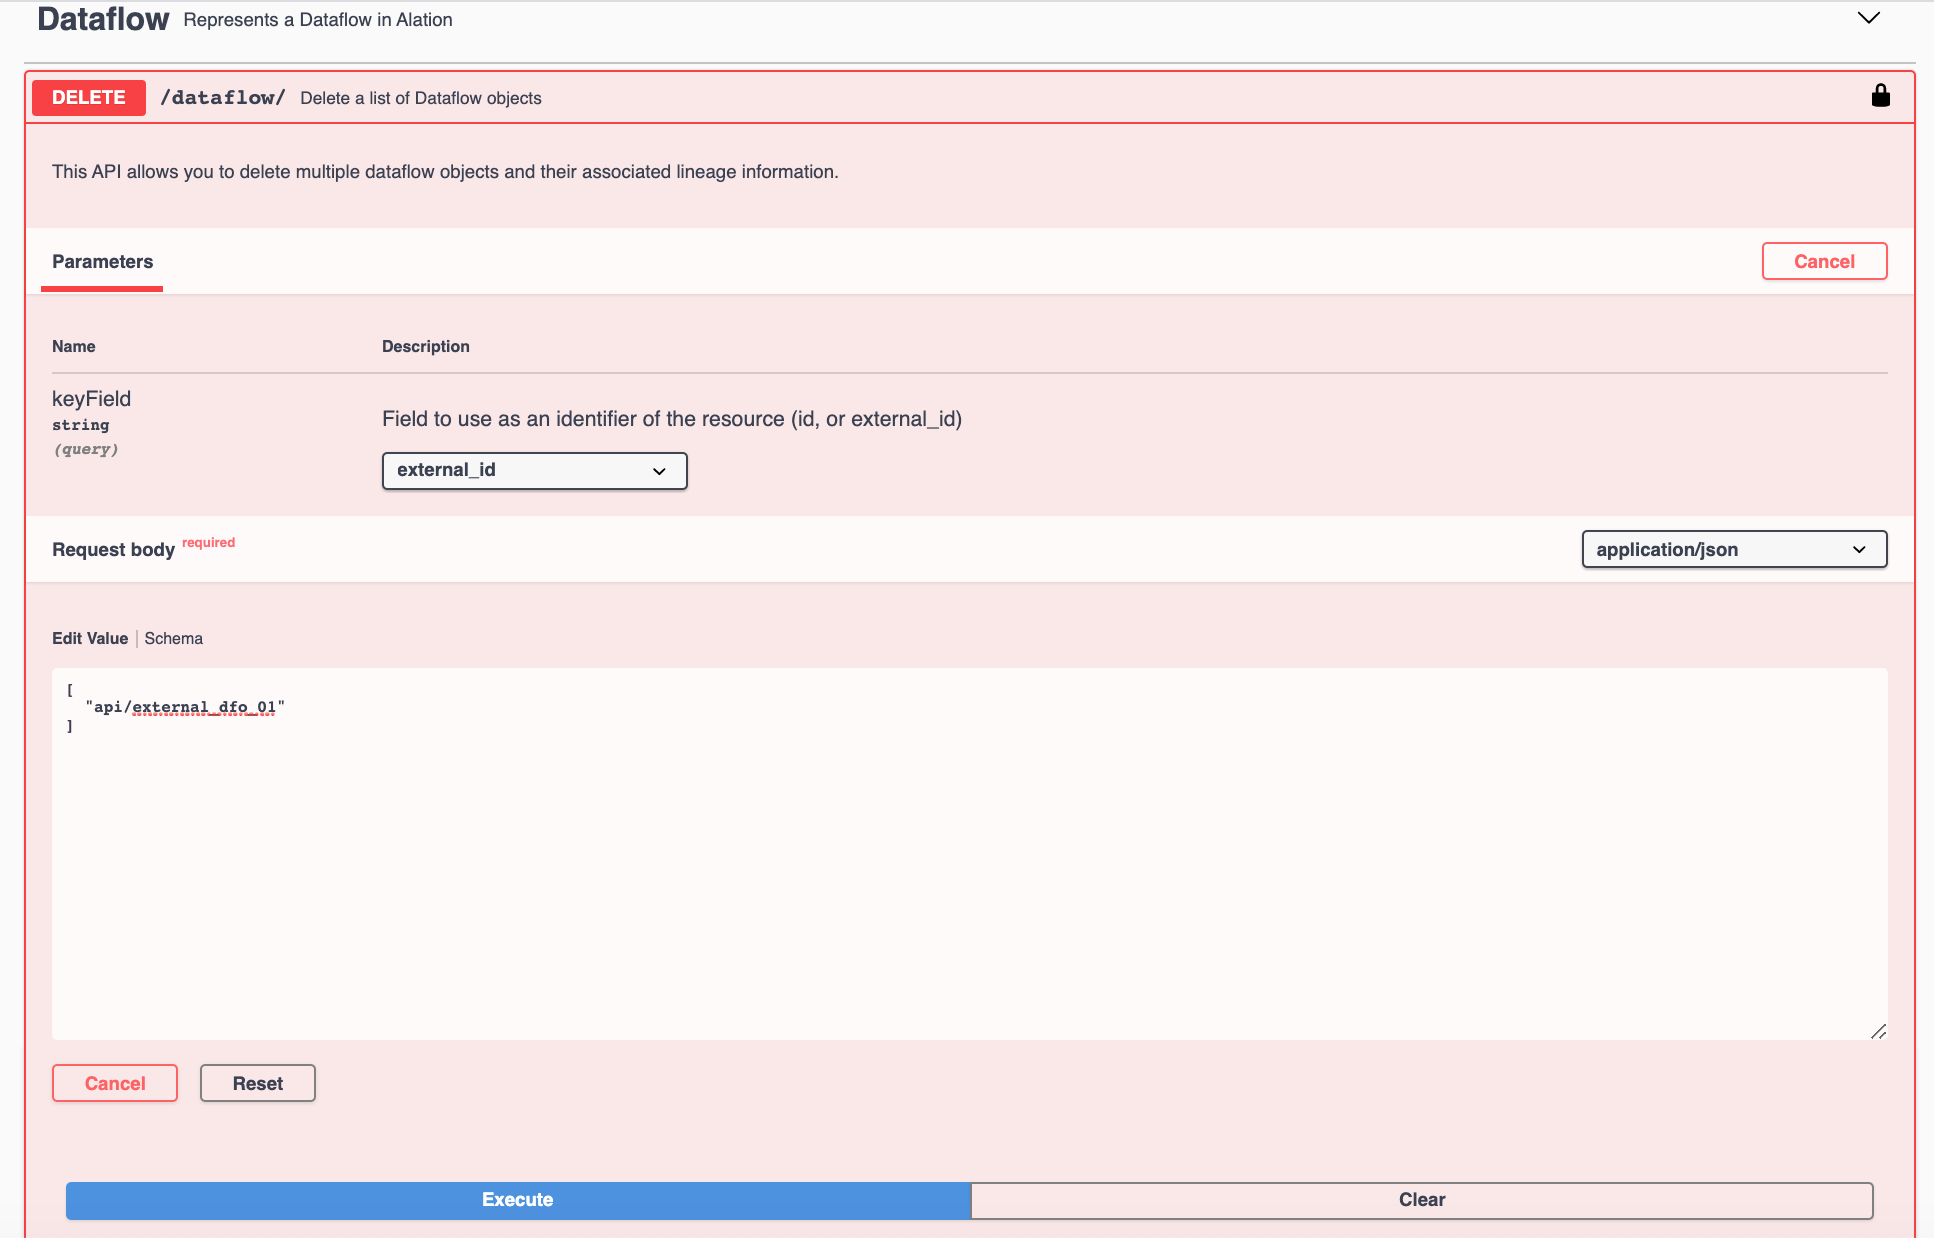
- Click Execute.The dataflow object will be deleted together with the lineage links associated with it. You can check it in Alation by navigating to you data source > reportData schema > TeamsAndOrders table > Lineage tab.

Updated almost 2 years ago